This is my first The Monthly Stitch submission! I’ve been technically a member for a few months but I hadn’t gotten around to taking on one of the monthly challenges.
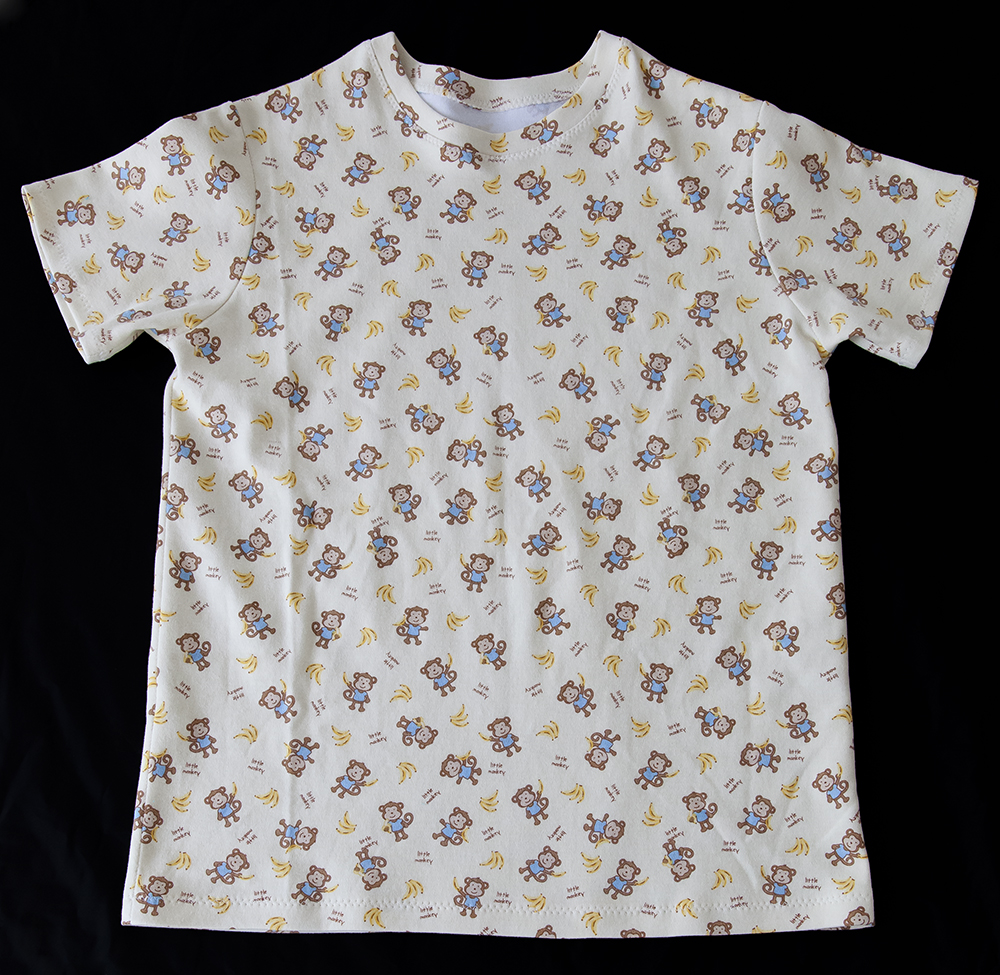
This month, the challenge is “Meanswear and Childrenswear” and I knew I wanted to make something for my son. I did quite a bit of pattern research but, as I have expressed before, while patterns for girls are plentiful, it’s slim pickings when it comes to boys. In the end, I settled for something utilitarian, a pair of pajamas, but I couldn’t find a pattern for what I had in mind. So, what I did was draft a pattern. For the top, I went off a tshirt of his that fits relatively loose. The idea is that the pajamas will grow with him. This is even more plausible because I made them from interlock, which is a knit fabric and thus will stretch. Ready to wear pajamas are usually close-fitting so these should last a long time.
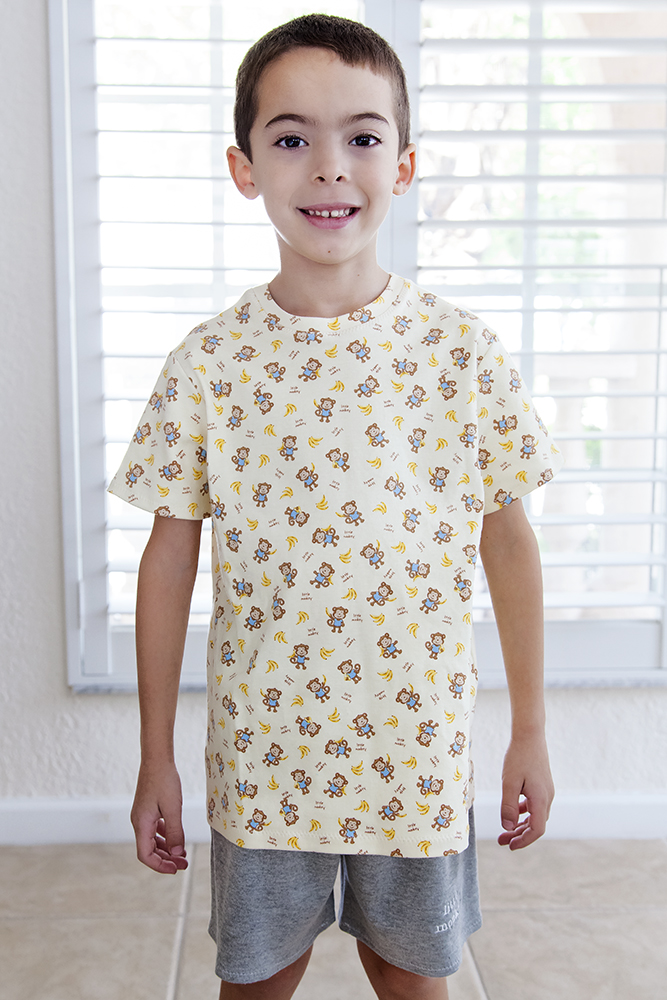
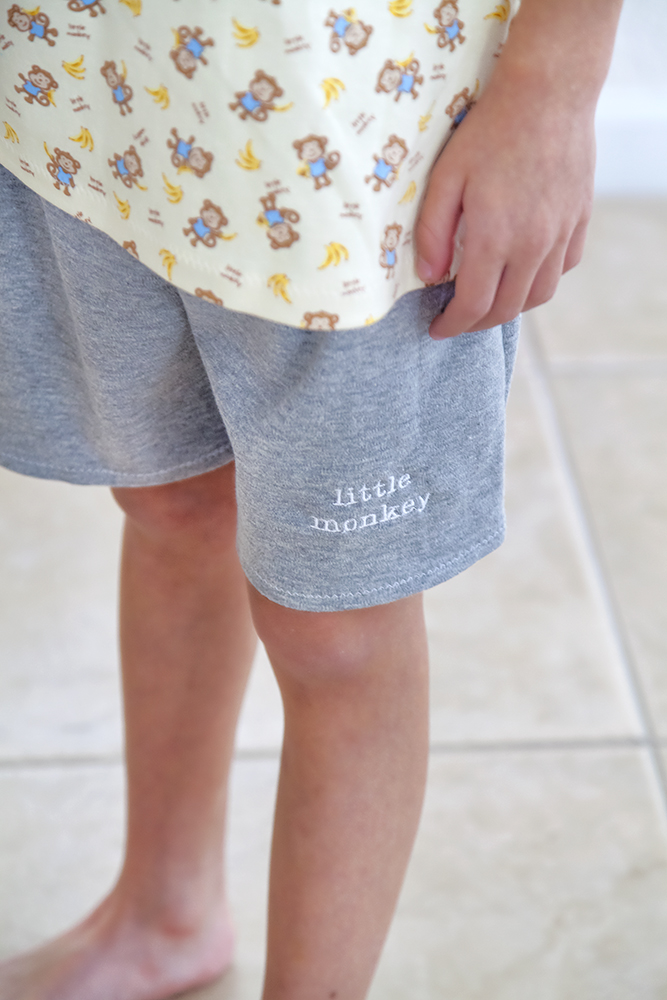
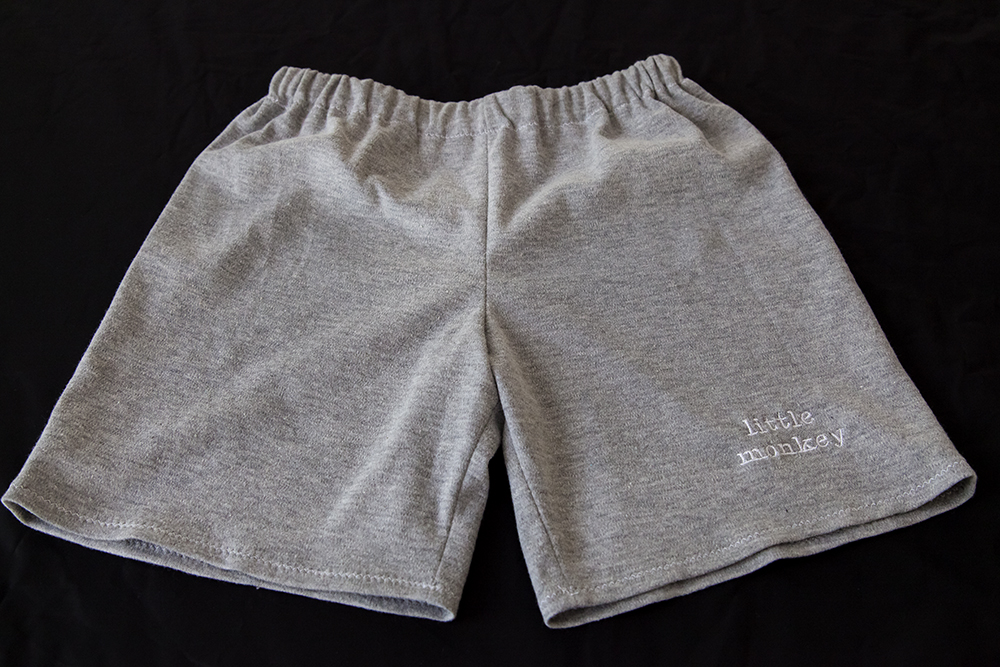
My son’s nickname is “Monkey” and I thought it would be cute to make the pajamas from the last bit of a cute “little monkey” print interlock I’ve had in my stash since he was a baby. I didn’t have enough of that fabric for the shorts so I used a gray interlock I had instead. I think it goes well with the shirt fabric. To tie it all together, I embroidered “little monkey” on the left leg of the pajama shorts, also because, if I’m honest, embroider all the things! He loved that little touch.
I’m currently working on trying to figure out how to make this pattern into a PDF one so that I can put it up here for download, but that comes with an enormous learning curve and I have a lot going on right now so it may take a while.
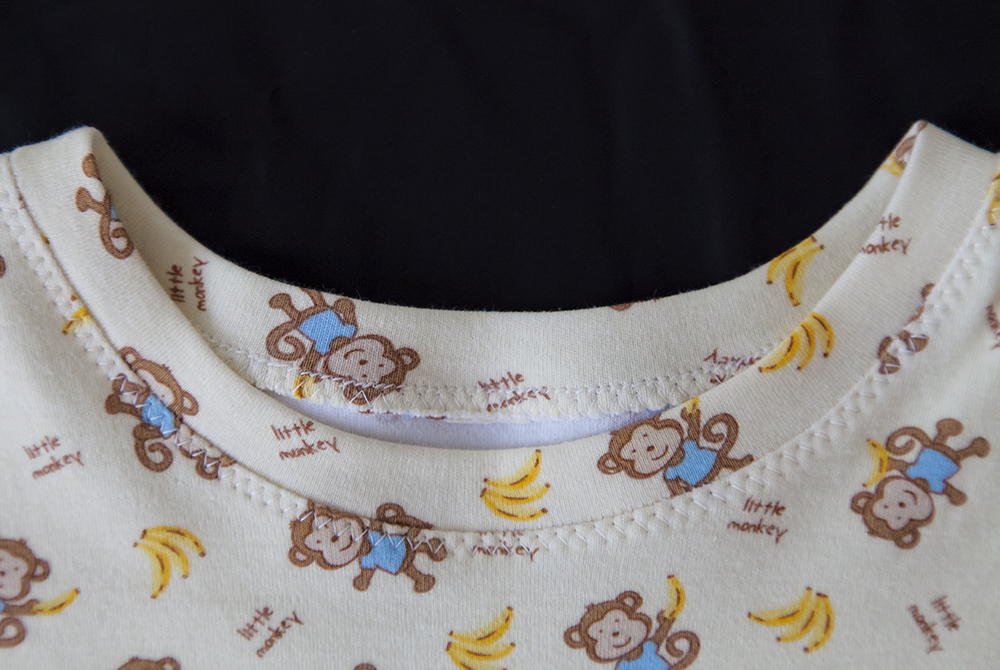
I have a serger, but since I had the idea of sharing this pattern as a PDF almost from the beginning, and not all sewists have sergers, I decided to construct both pieces (top and bottom) completely on a sewing machine. It helps that interlock doesn’t fray, doesn’t roll, and it’s pretty stable. For the seams, I used a stretch stitch on my machine that looks almost like a straight stitch when sewn, except that it has a bit of a slant that provides stretch. It is stitch #2 in this chart. I sewed the “ribbing” (it’s not actually ribbed) to the body using the same stretch stitch with right sides together, the turned the seams to the inside and top-stitched the ribbing in place using a zigzag stitch and making sure to catch the seam allowance inside. I used a simple zigzag for the body and sleeve hem, as well as for the hem of the shorts and the elastic casing. One last note on construction; rather than fight these sleeves to set them in, I sewed them to the body flat. It’s a knit, and they are pajamas, so the effort to sew them in the round was not worth it, and it doesn’t make one bit of difference. I’m learning to pick my sewing battles.
All in all, I’m very pleased with how it all turned out, especially considering I didn’t strictly speaking have a pattern. My son, as always, was over the moon when he saw what mami made him.


Leave a Reply