I’m so fancy.
I mentioned in a previous post that I had made the Linden Sweatshirt by Grainline Studio a total of six times. Four of those times were in a single month this year. Excessive? Maybe, but I know the pattern well and if it works, why not make several times in different fabrics?
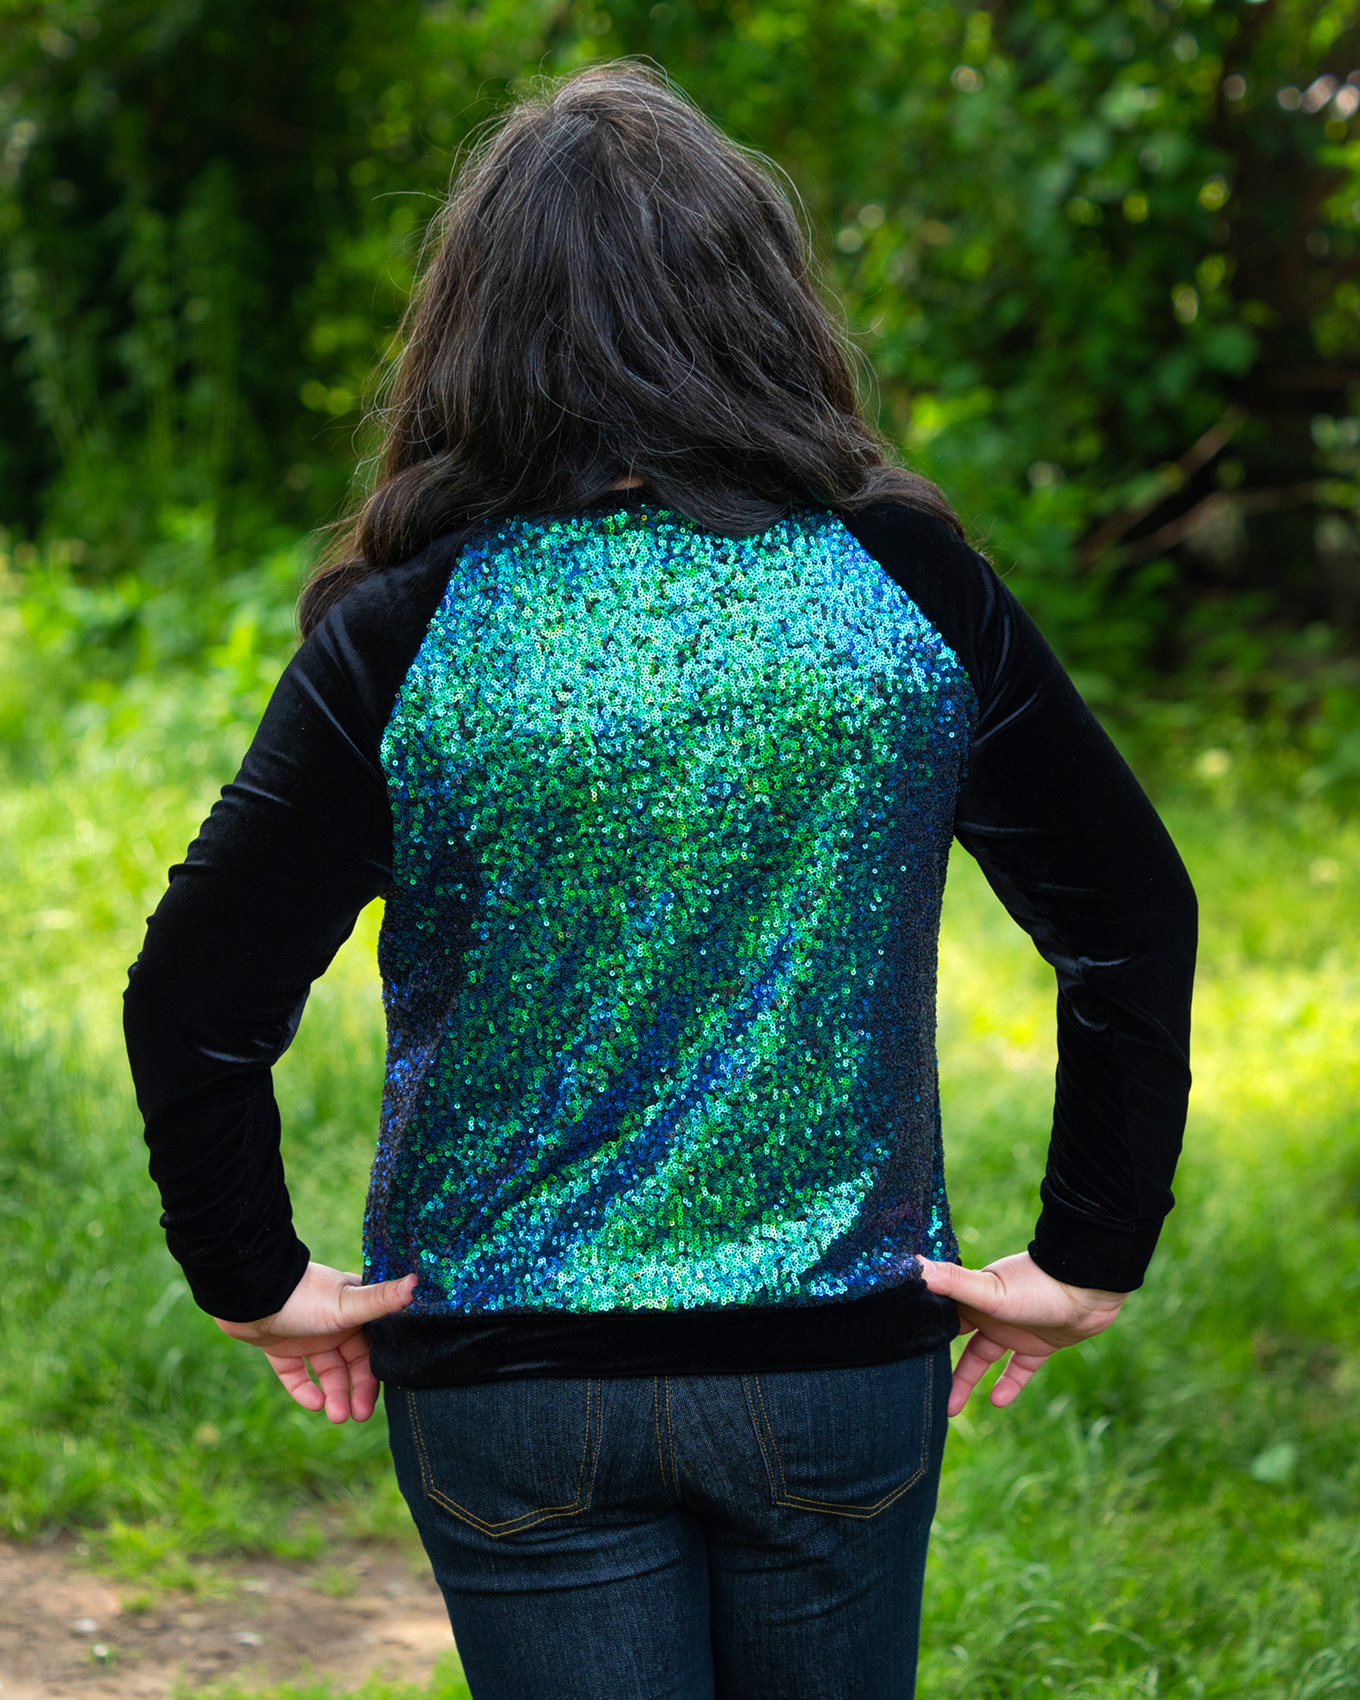
And here I give to you the ultimate Linden Sweatshirt; the fanciest sweatshirt I will ever own.
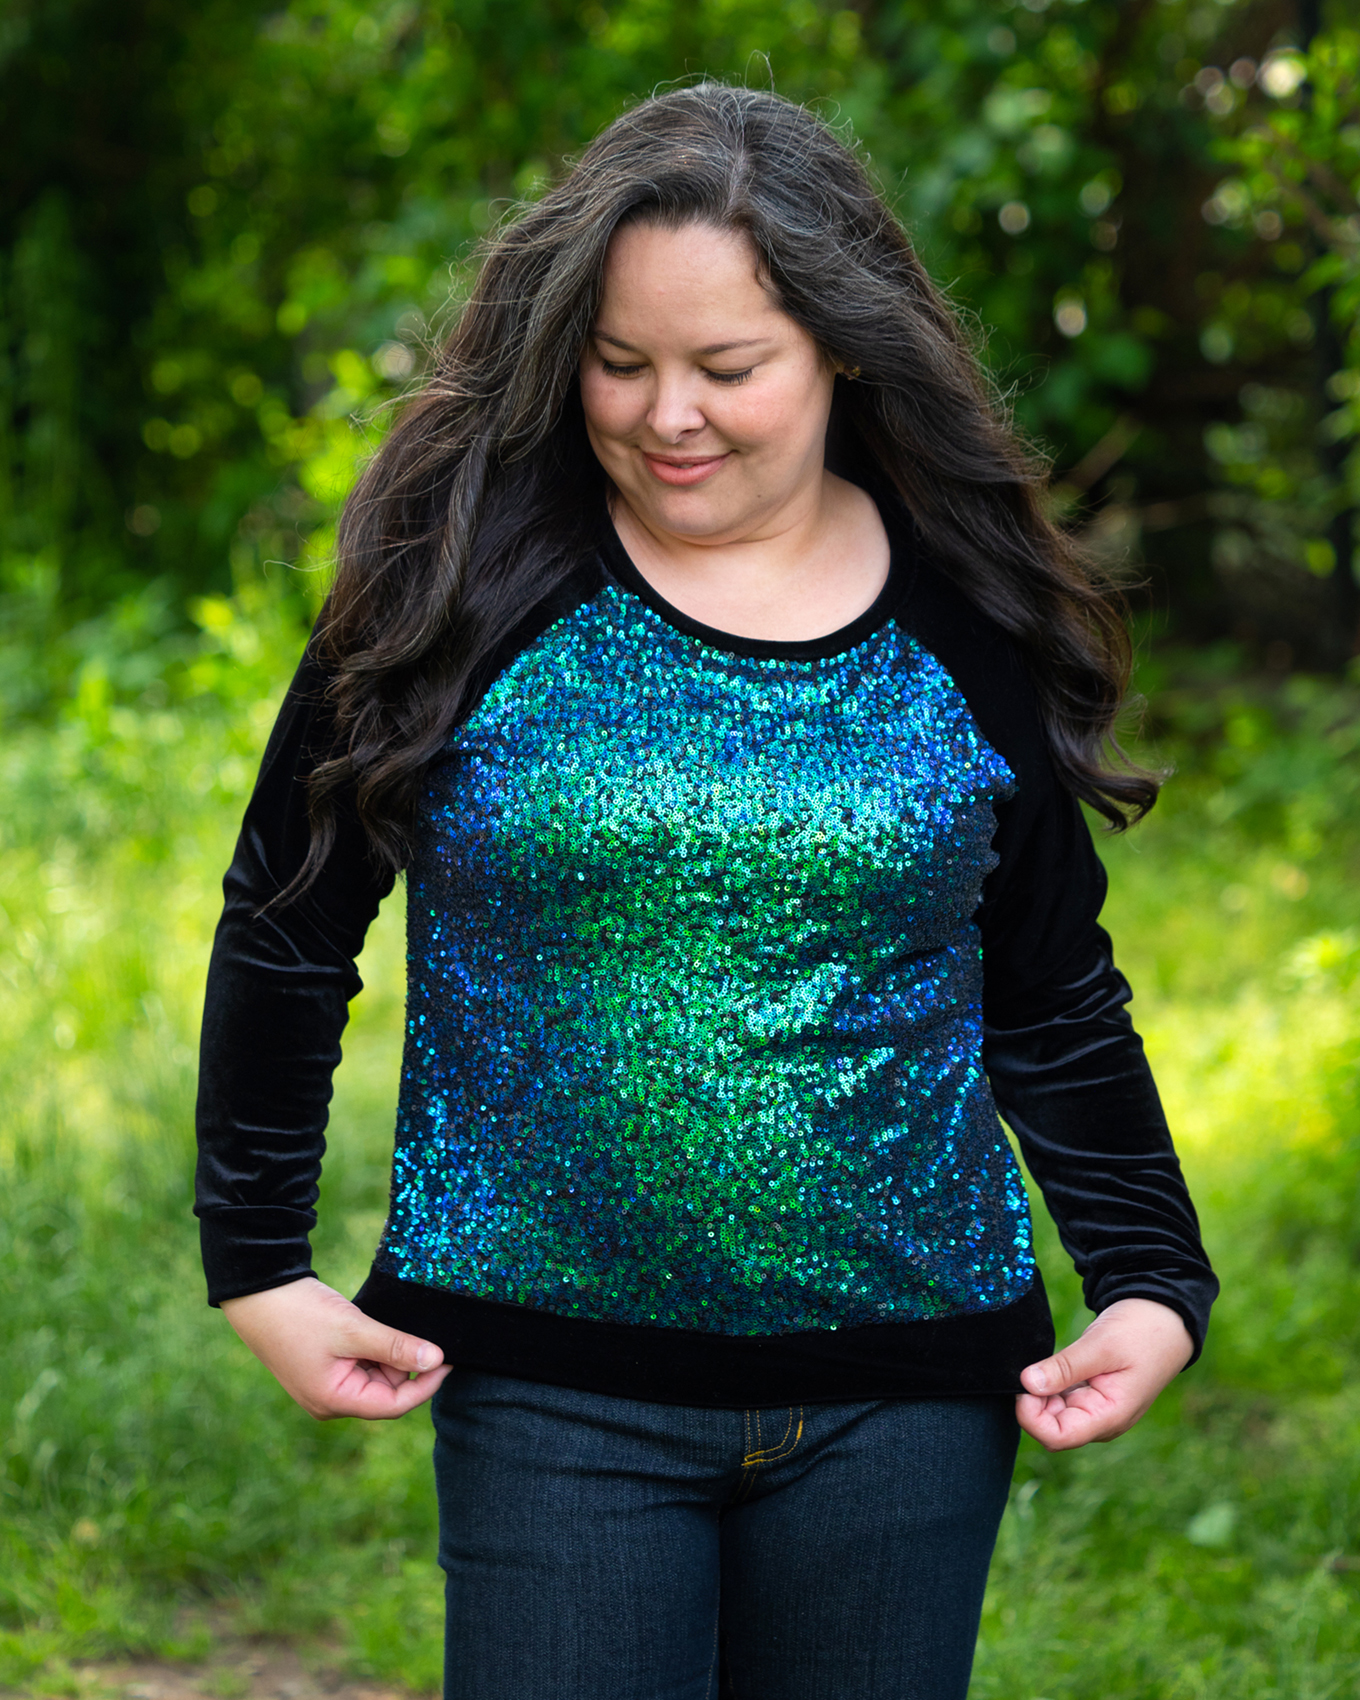
I got the idea of making a stretch velvet and sequin sweatshirt in my head early last year, but being away doing research, only being home in NYC during the summer, etc. did not really help the case.
So, when I got home in December, I started looking for materials in earnest.
Believe it or not, finding sequins I liked on stretch mesh that stretched on the crossgrain rather than along the grain (so across the body rather than up and down) was very, very difficult.
For some crazy reason most stretch sequin fabric stretches along the grain, which makes it useless as a substitute for stretch fabric for a sweatshirt.
I looked online, I walked up and down the garment district, I agonized, and then I found ONE fabric that would work. Luckily, the colors of the sequin were great, they are the mermaid type (although not changeable) and I love it.

If you are interested, I bought it from Spandex World for $20 a yard. I only bought one year and have leftover fabric as it’s really wide.
The stretch velvet was not as difficult to find, I bought it form fabric.com
So, once I had all the materials, I psyched myself up to actually sewing with sequins.
I had done extensive research on the matter and so much of it tells you to remove the sequins from the seam line, do this, do that, etc. Enough to really put you off.
But I had also watched a video from Guthrie & Ghani where Lauren said that if your sequins are small enough you don’t need to remove them. I was all for that.
So, I cut into the fabric (with my fabric scissors, paper scissors, which some people recommend, did not cut the sequins), I watched sequins fly all over the place, and got to sewing. On the sewing machine, of course, since the sequins cannot go through the serger.
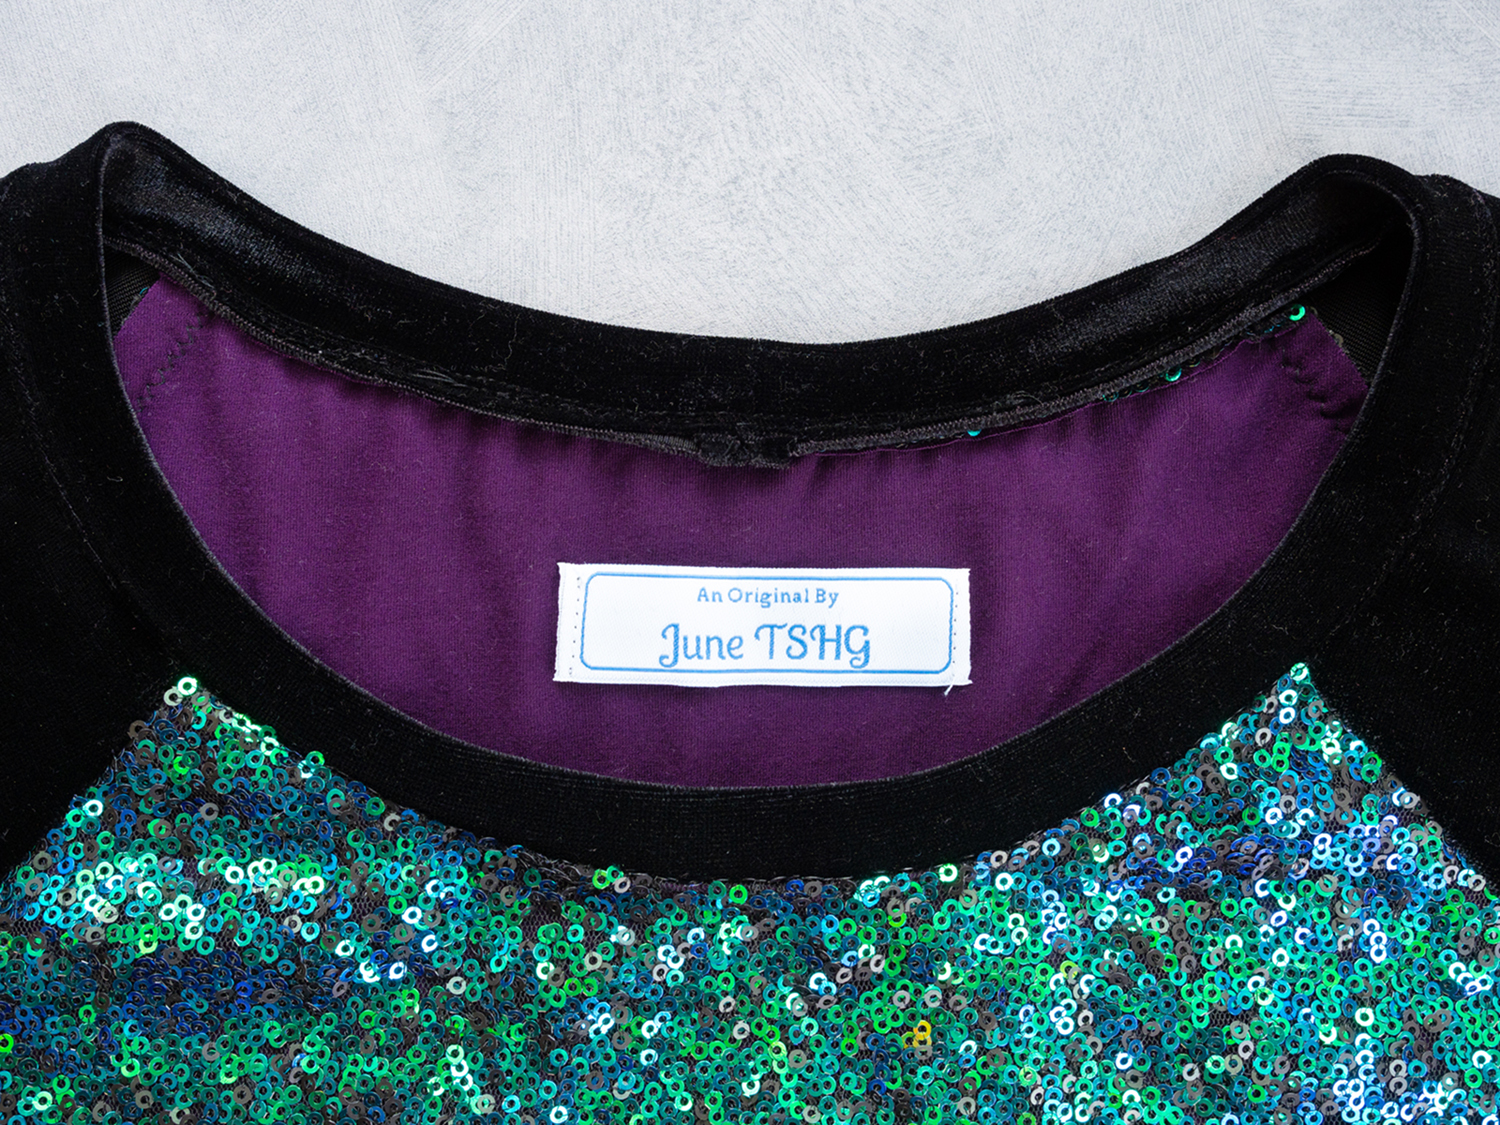
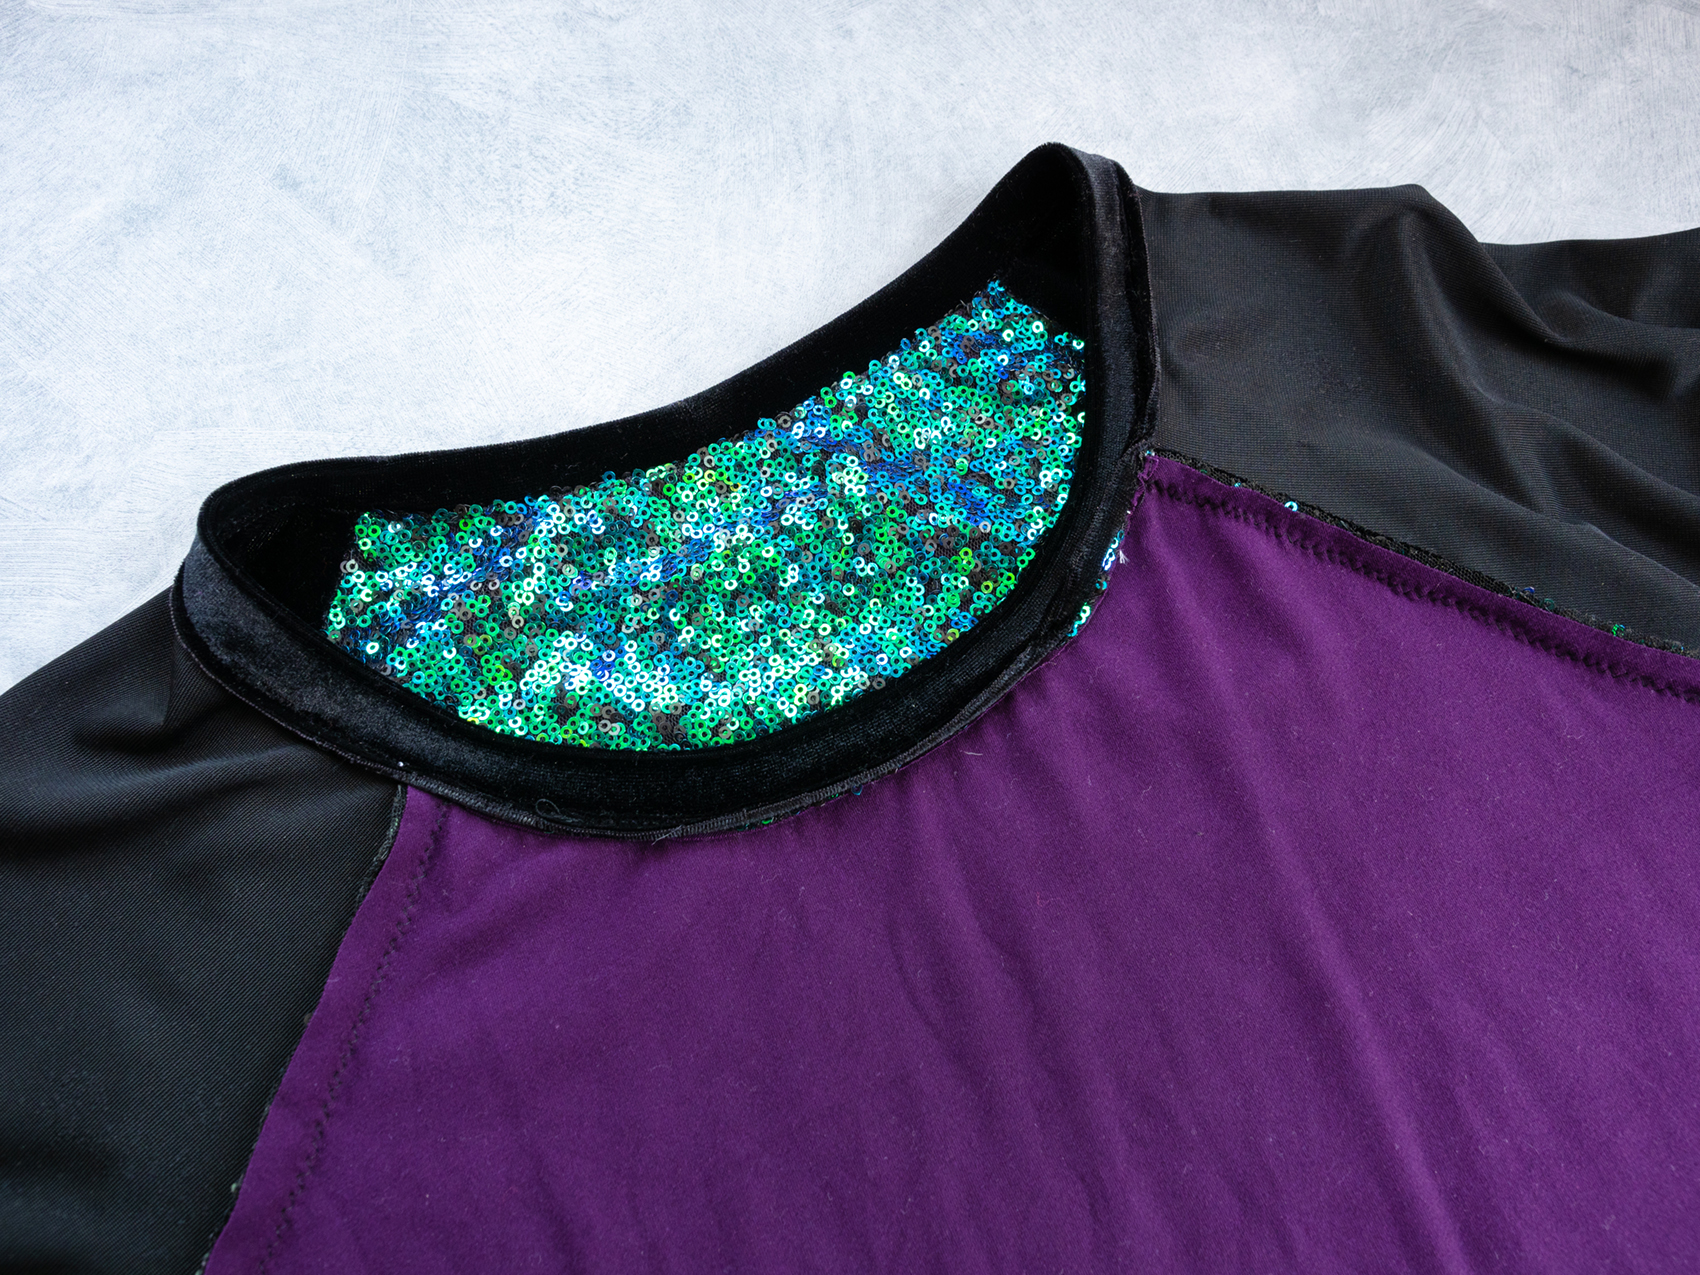
The mesh to where the sequins are attached is pretty rough and doesn’t feel good against the skin. To remedy this, I flat-lined the front and back with bamboo/lycra jersey. I did not line the sleeves.
It was not an easy sew, I’ll be honest, but not for the reason you might think.
It was not the sequins, it was the stretch velvet. The wrong side of the velvet is REALLY slippery. It made attaching the neckband, hemband, and cuffs really hard as they are folded wrong sides together. Hand-basting here is a MUST.

You also can’t press much. I didn’t have a velvet pin board so I made do with a rolled up towel.
I am happy to report that I did not break a single needle in the process of sewing this sweatshirt, my machine did just fine, and my fabric scissors lived to cut another day!
The inside of the sweatshirt is not as neat as I’d like, the seams are raw, but nobody will ever see that and the seams do not fray.

On to the pattern itself.
I cut a size 10 at the shoulders and bust, tapering down to a size 8 at the hips. I shortened the sleeves 3 1/4″ and the body 1″.
One thing I learned from this is that when sewing with sequins and velvet you’ll probably want to add a bit more seam allowance that you think you’ll need as they will take up a larger allowance. This sweatshirt is a bit more snug than another one I made with the same pattern pieces and size.
I am SO pleased with this project.
I love how it looks. I love the juxtaposition of the sporty look of a sweatshirt and the glamour, if you will, of sequins and velvet. You can see it in action in this video.
I love it.
I am still finding sequins on the floor six months later.


Leave a Reply