Last week I decided, on a whim, that I was going to sew up some garb for an SCA event that took place yesterday. Everything sewing related that I own is still in boxes from my last move in October (I know, I know) so I had to quickly improvise. My sewing machine was also in the shop where I took it for cleaning and maintenance, but that’s a story for another time. The first thing I did after coming up with this half baked idea was to choose which pattern to use, and dig it out of boxes. I debated between three different patterns and decided on this one because it seemed the easiest and I was crunched for time. Now, I’ve had this pattern since some time in early 2004, and had once bought fabric to make it up but didn’t get around to it.
 |
| Pattern envelope image |
The time line from conception to completion went something like this:
-Friday: Pour over patterns, look at online reviews (scant to nonexistent), still no decision.
-Saturday: Finally decided on Costume Connection 1102W
-Sunday: Trace the pattern and cut the paper pieces.
-Monday: Buy fabric and prep it, dye tunic and lining fabric yellow.
-Tuesday: Cut tunic from the fabric
-Wednesday: Fully construct tunic.
-Thursday: Cut overtunic and construct. I did everything except attach the lining for the sleeves at the elbow seam and hem.
-Friday: Finish hand sewing sleeve lining to the elbow seam and hem the tunic. Make the veil and decide how to wear it.
-Saturday: Wear the whole thing and be glad it was over. Complain all day about how hot it was.
The pattern itself is very simple and suited for a beginner, except I made some changes that made it a bit more time consuming but worth it for the appearance of the completed garb. The biggest and most obvious change I made was lining the lower part of the sleeves, which was done in a bit of a misguided notion but worth it in the end nonetheless. The image on the pattern envelope gives the impression of long, flowy, pendant sleeves, and I did not want to have the seam showing, as would certainly be the case if the sleeves looked like that in reality, which they did not. The sleeves were big, but not in the same style as the pattern image. Nevertheless, the lining of the sleeves gives it a little bit of oomph.
The way I lined the sleeves was by cutting out the sleeve pieces in the lining fabric. I sewed the lining and the sleeves together at the hem after attaching the sleeves to the tunic at the elbow. When the time came to sew the overtunic’s side seams, which normally would end at the wrist, I kept going and sewed the lining too. Then I turned the lining up into the sleeves and attached it to the elbow seam by hand. I hope that makes sense. This isn’t necessary if you can take the time to either do flat-felled seams or do an otherwise period seam finishing. I did not have time. I should point out that while lining the sleeves looks nice and finished, it makes the overtunic hot…and I live in Florida. You do the math.
Another change I made was in the facing of the overtunic. Period facings were not like modern facings used in home sewing, which basically waste a lot of fabric. Instead cutting out a piece of fabric that matches the shape of the neckline, they took a long piece of fabric and made something similar to a bias tape but on the grain (so far as I can tell from research) and use that to face the neckline in the same way we’d use bias tape. This was more fabric efficient as it could be made from scraps and was also easier to manage I actually used a reverse facing so that it it turned outwards and serves as decoration. This “shortcut” saved me the time it would have taken to hand sew the facing to the inside of the garment. Win Win.
Finally, I did not add any trim to the sleeves or the hem of the overtunic because of time constraints but it is something that can definitely be done post construction, since it’d most likely be done by hand or it would obviate the purpose of lining the sleeves in the first place. I also eliminated the back seam on the overtunic and did not do a keyhole opening for the back. This added an inch of width to the neckline and the back of the tunic, which wasn’t so great as you’ll see in a minute.
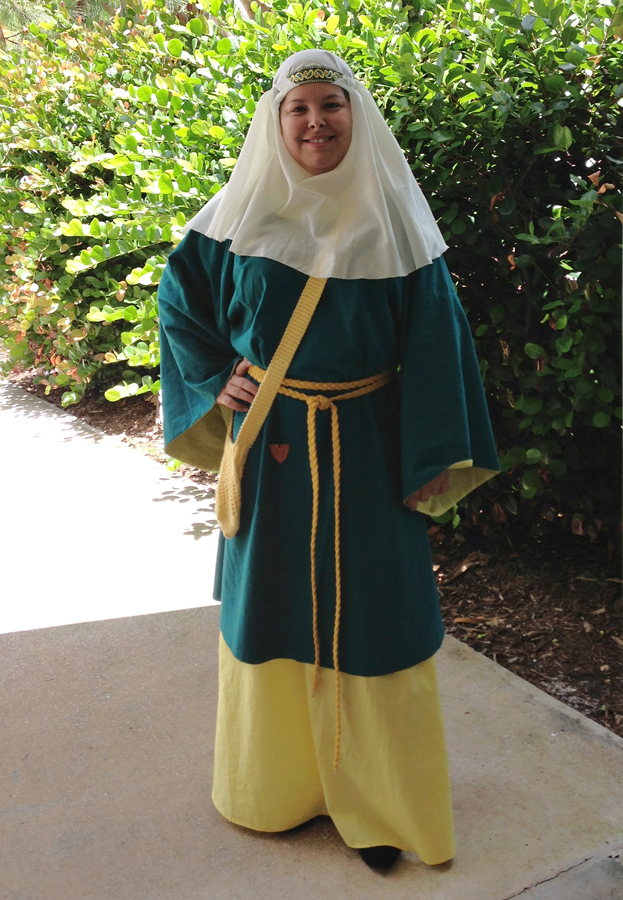
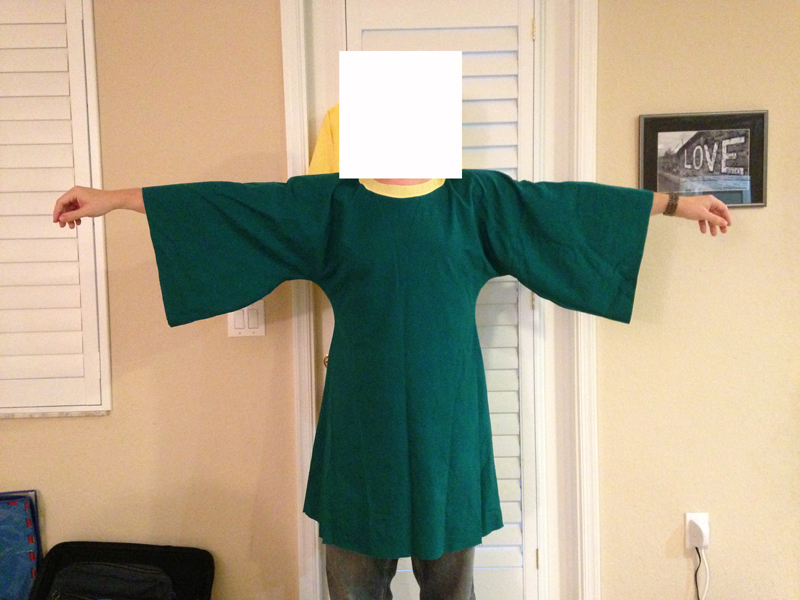
Now, on to fit. The tunic (yellow in the photo) fits fine. I am very short (not quite 5’2″) so I had to shorten it considerably, which is to be expected. The overtunic, on the other hand, runs HUGE. HUGE. I cut a medium and I really which the pattern came in extra small. Now, 11th century women did not wear skin hugging clothes but I doubt they wore stuff this baggy either. In other to make it look decent, I had to wear it with a belt, which is fine, but no what the pattern depicts. To give you an idea of the size of this thing, here is my 6’5″230+ pound husband wearing it. It looks a regular tunic on him, except for the fact that it’s contoured to a woman’s body shape. It’s really huge. Next time I will cut a small and do 1 inch seams. Also, I made it in a linen-cotton blend and it grows. I’d imagine it’d be worse in 100% linen. Lesson learned.
Other than size, the pattern is relative well drafted. The neck facings for the overtunic were not a perfect fit to the neckline but that may have been due to stretching, I can’t be sure.
The veil, there is only one thing wrong with it: the face opening is MUCH, MUCH, too large. I took an inch off the radius (2 inches off the diameter) and it was still much too large to be worn as the pattern image suggest. Hence why I wore a ribbon and pinned the veil up. This is period and not necessarily a problem but if you want to look like the pattern picture, keep this in mind when you make up the veil.
With all that said, I am actually very happy with the results. The outfit is not perfect, but it served its purpose and, considering the rushed manner in which it was constructed. It looks great. I will definitely make this again with the changes needed to make it better.
Leave a Reply