I brainstormed for this projects for what seemed like months before I even settled on a pattern to use as the base for this jacket. How am I going to make the sleeves? What fabric is best for this project? Etc. In the very initial stages of brainstorming, I wanted fitted sleeves with big hearts sewn on the bicep area, like something out of a Pattern Magic book. This is an achievable end, but not with the size that I needed the hearts to be for the Effie look. Back to square one, and it was at this point that I decided to just do the puffy sleeves. My biggest concern was how to make the sleeves and keep them puffy. I have no insight on how the original Effie Trinket reaping costume was made so I was reinventing the wheel, so to speak. I bounced a few ideas around in my head, like drafting leg-o-mutton sleeves, but those weren’t right. Then I thought I’d have puffy sleeves down to just below the elbow, and attach them to the fitted portion of the sleeve. This meant I’d have to either make the forearm very fitted to keep the sleeves from sliding down and stretching the puffy portion, or stuffing the balloon to maintain the shape. Nah. In the end, I decided to keep a full jacket sleeve and just draft a puffy over-sleeve, for lack of a better term. This was good because the regular jacket sleeve served as sleeve stays for the puffy portion. I used a two pieces sleeve pattern and drafted the over-sleeve only for the upper sleeve portion, leaving the side of the sleeve closest to my body flat. I hope that makes sense!
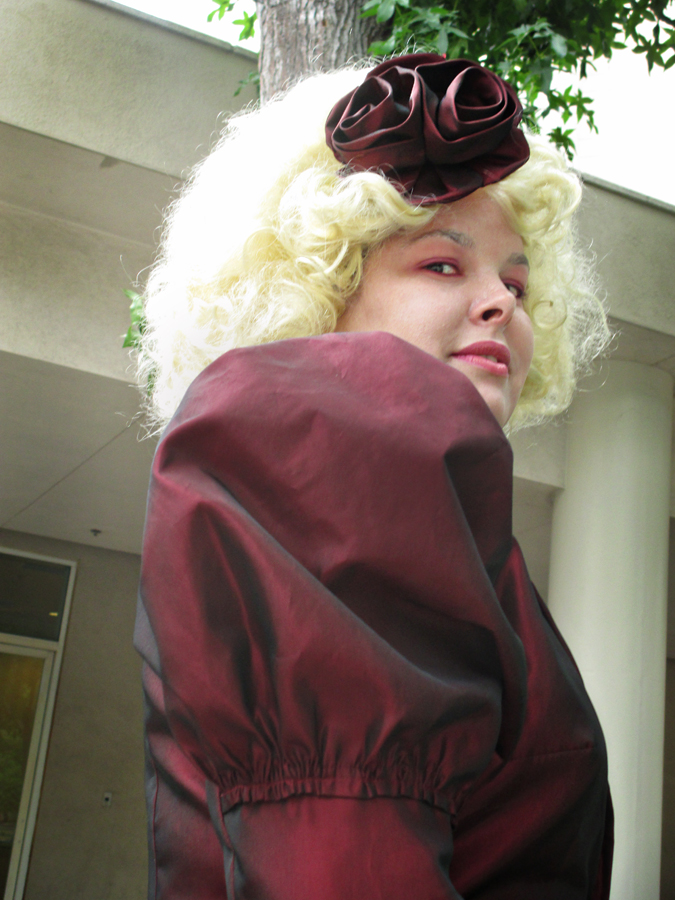
The base for the jacket is BurdaStyle 03-2011-120, which went together beautifully. I did have to make some usual fitting adjustments, like swayback, and narrow sloping shoulders, but other than that, it was pretty good. This was my first jacket with a notched collar AND collar stand so that was a bit tricky, but once I grasped how it was supposed to go together, it was easier. I kept the original jacket design for the most part, except that I only used two snaps (the bottom two) instead of the three the pattern calls for, and I added non-functional covered buttons to hide the snap stitching on my very thin and crisp fabric. The jacket bodice and sleeves are fully lined with bemberg, and the peplum is lined with self fabric. If it wasn’t for the crazy sleeves, this jacket would be just any other garment, made to be worn as clothing and not costume-y at all. I treated it as a normal jacket to the point where I wanted it to be perfect, and had to keep reminding myself that it was only a costume.
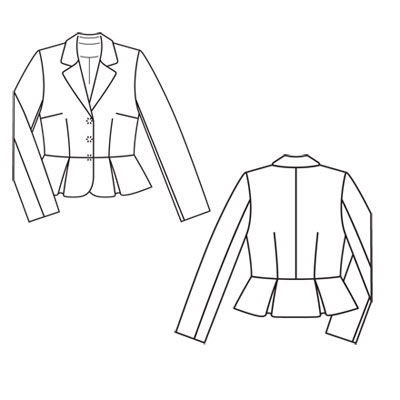
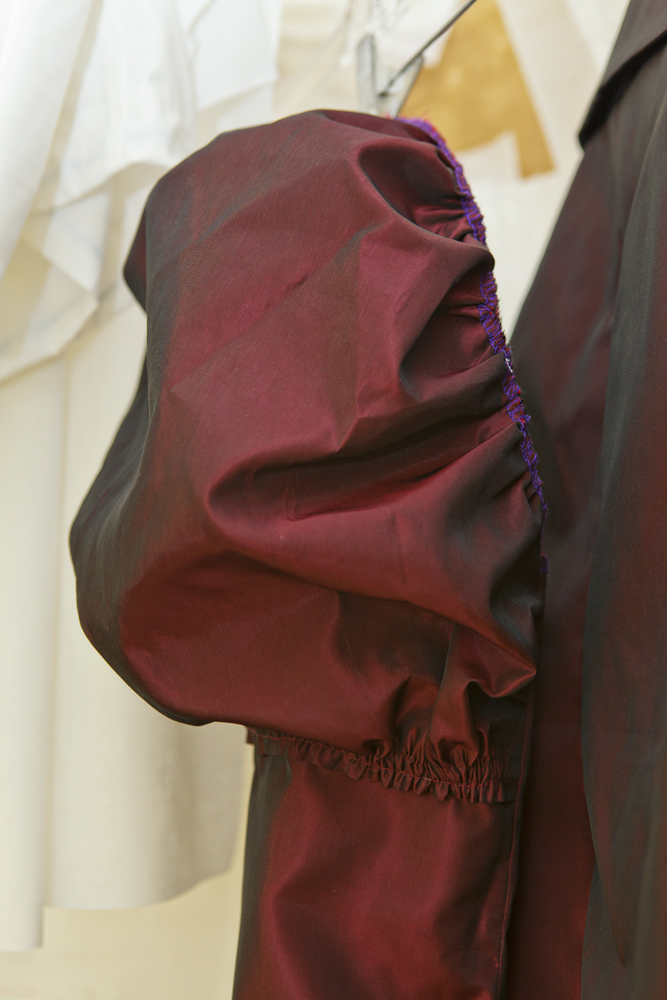
Sleeve Construction
1. Decide where on your arm you would like the puffy over-sleeve to end and mark that placement on your pattern piece. I recommend just above the elbow. Transfer the marking to your cut fabric piece.
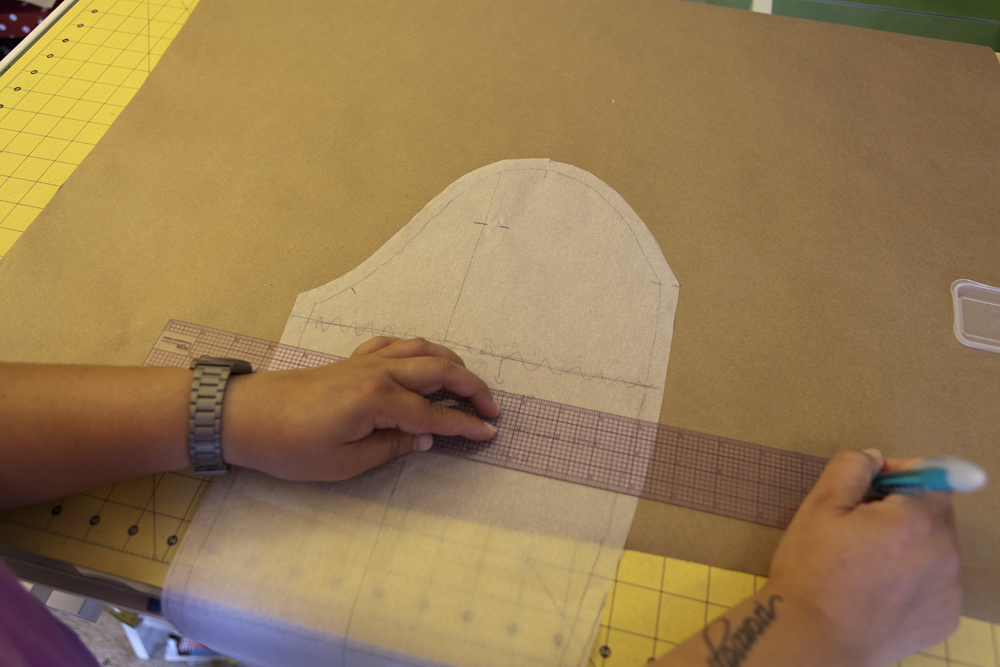
2. Place your sleeve pattern piece on a large piece of paper and secure it in place.
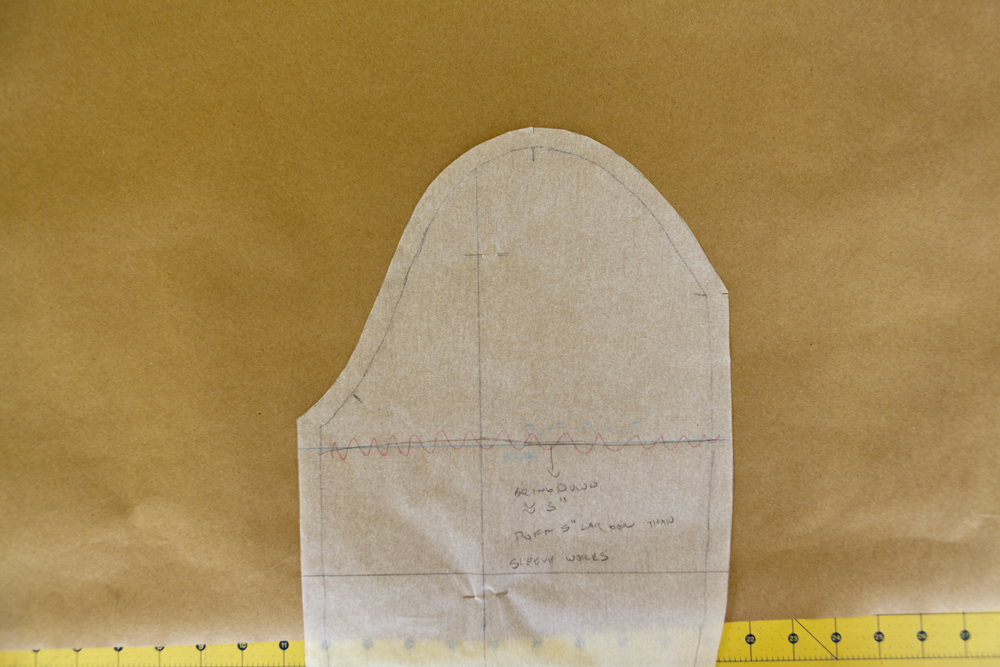
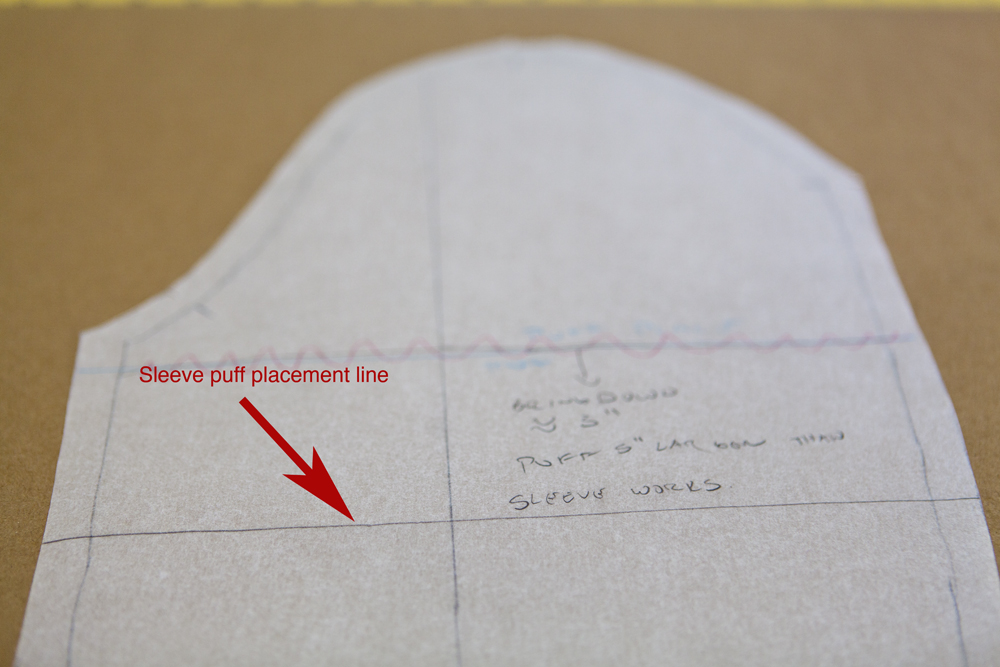
3. Decide how big you want your sleeves to be. I chose mine to be 5 inches larger all around, except the hem portion, than my sleeve pattern piece. This includes seam allowance. With a ruler, starting at the placement line and using the edge of the pattern piece as a guide, mark the cutting line for the puffy over-sleeve. Move the ruler around the pattern until you have marked all around. When you reach the opposite side of the sleeve pattern piece, draw a line between the ends of the shape you just drafted, minus the pattern piece in the middle. This will be the bottom edge of the over-sleeve.
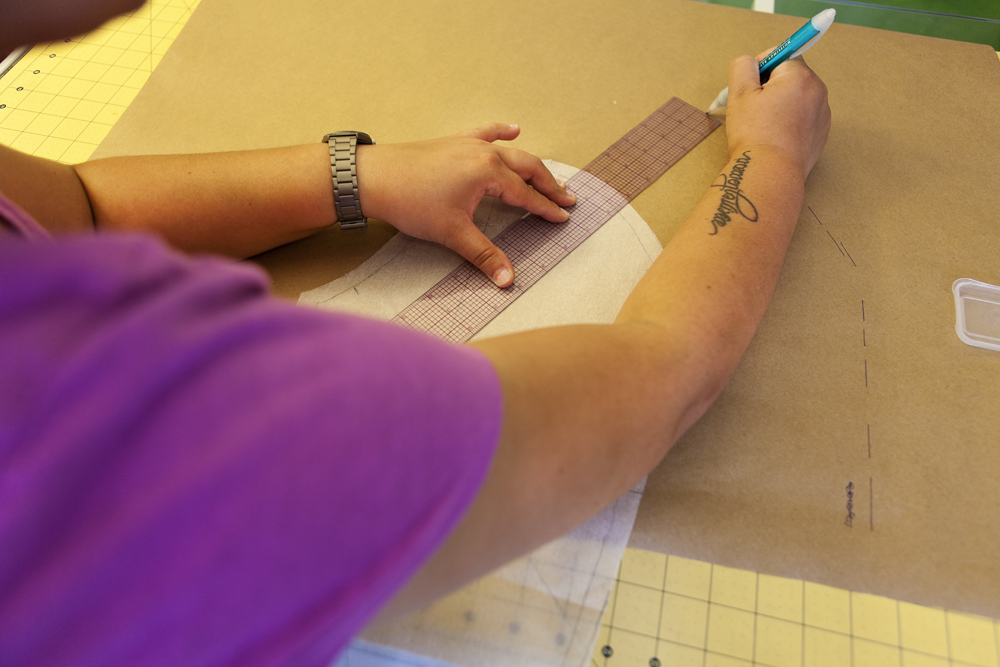
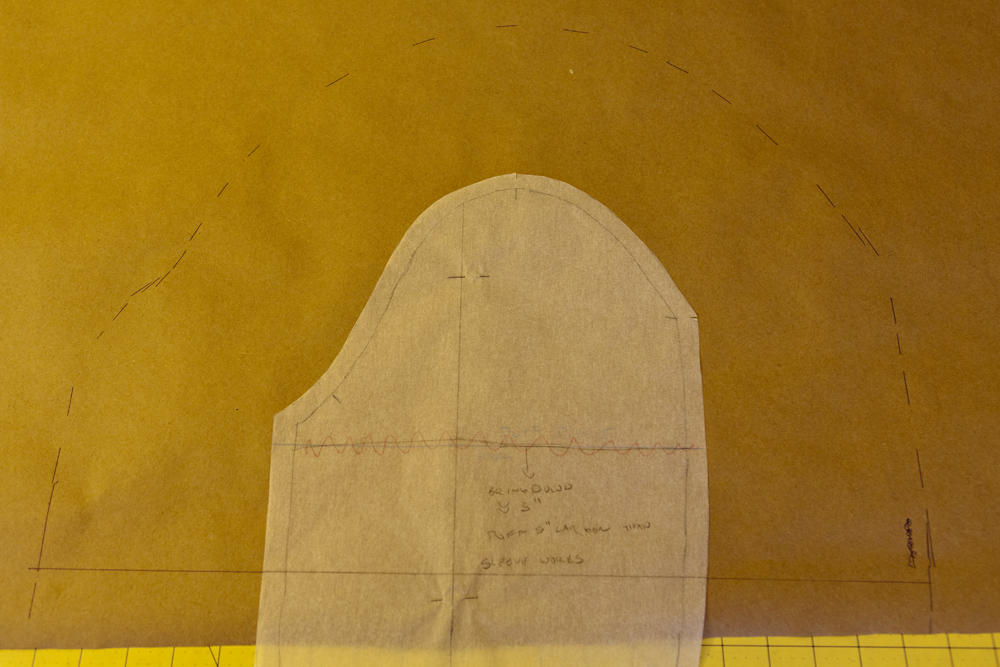
4. Remove the sleeve pattern from the tracing paper, connect the line, and add your desired hem allowance to the bottom of the pattern piece you have just created. I used half an inch. Cut the piece out and use it to cut your fabric.

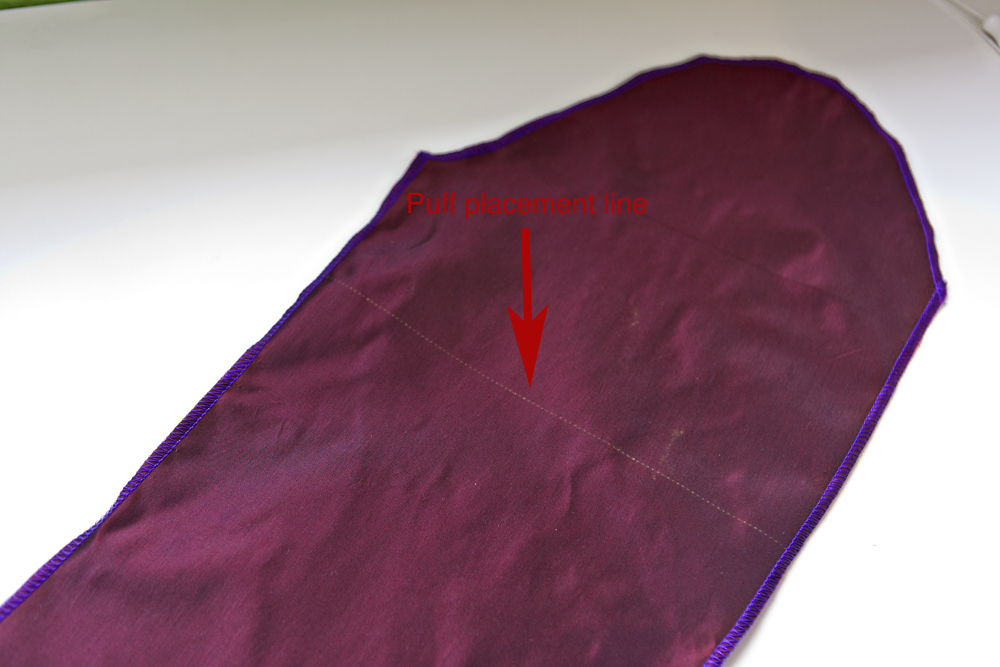
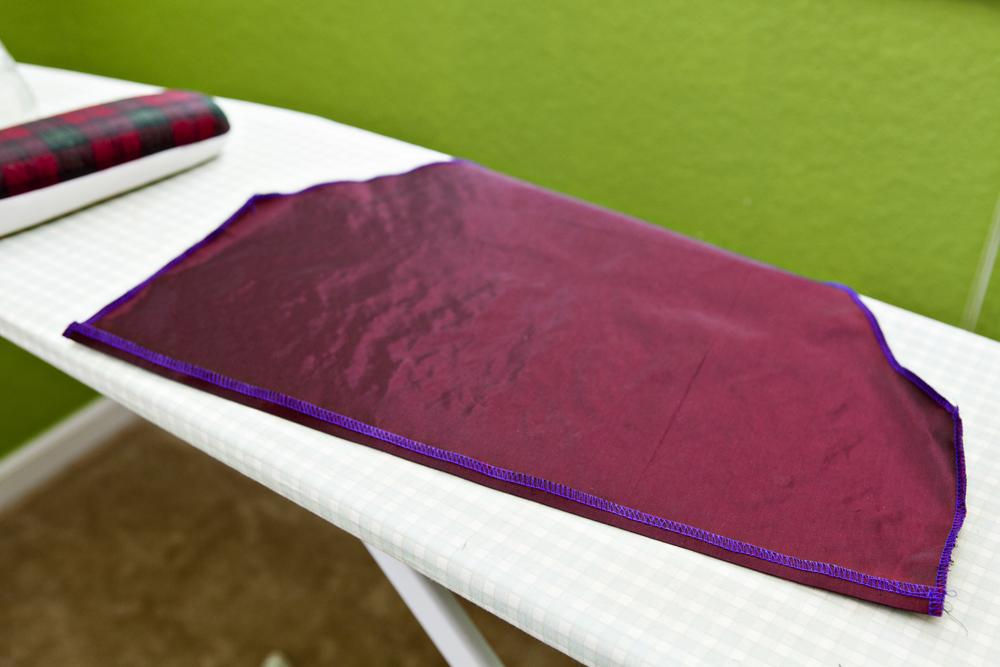
5. Fold the hem allowance to the inside and press it.
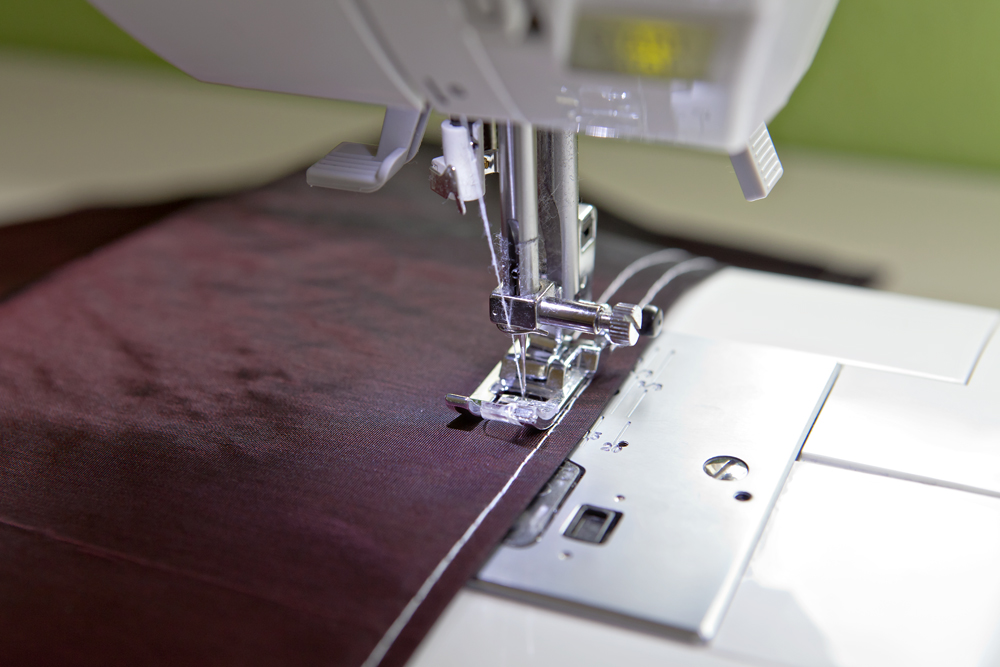
6. With the right side of the puffy over-sleeve facing up, and with a basting stitch in contrasting thread, sew two rows of stitches along hem edge. Gather this end to match the width of the sleeve at the placement line. Stiff fabric will remain gathered.
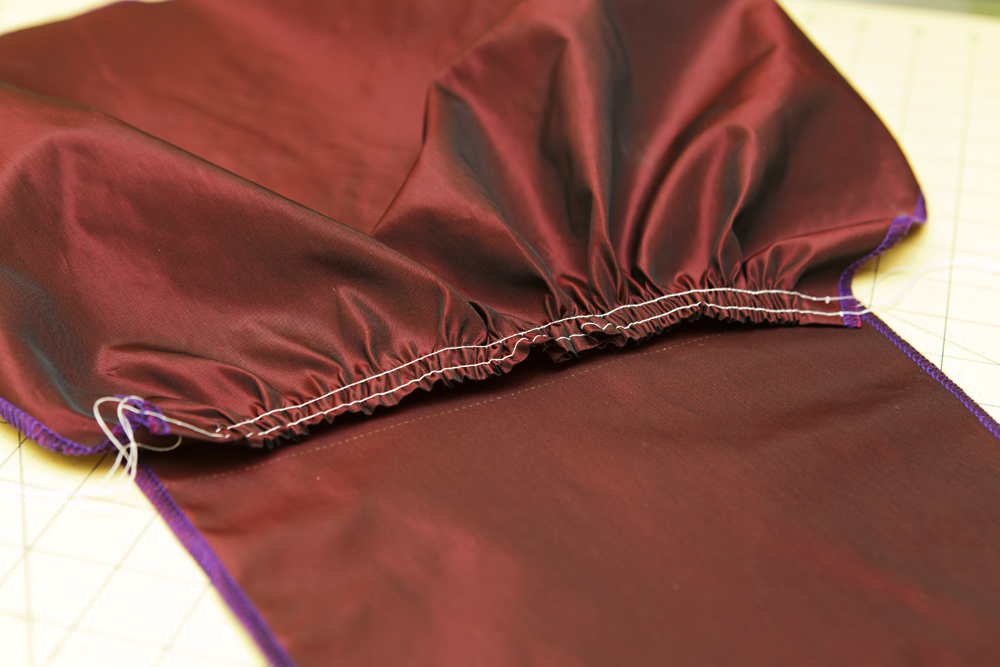
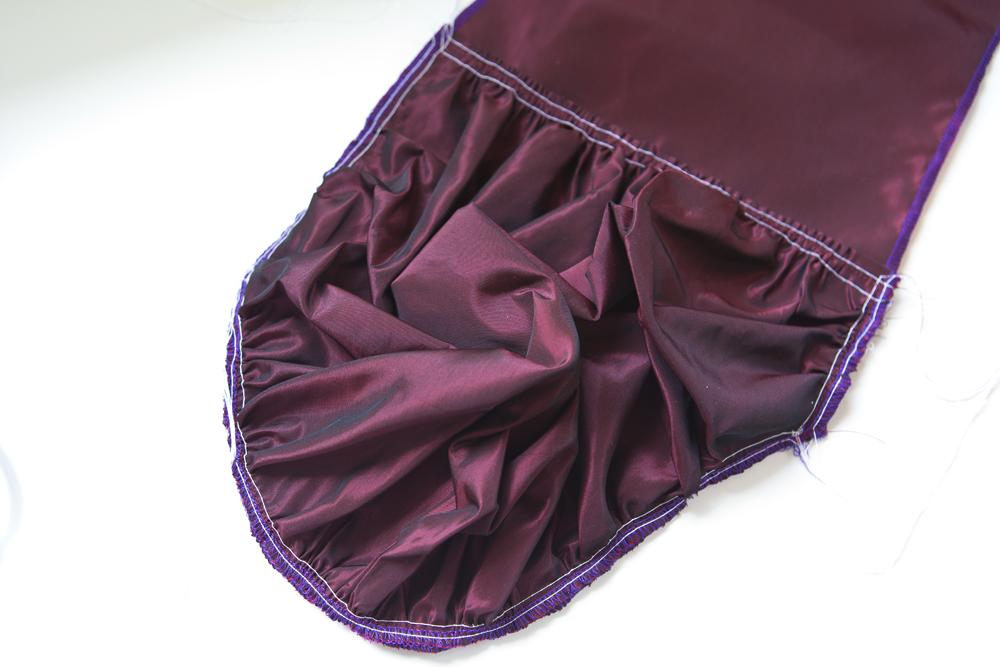
7. Sew gathering stitches in the same way around the remaining edges of the over-sleeve. Gather to fit on the jacket sleeve piece. As I mentioned, I was working only with the upper sleeve of the two piece sleeve. Pin in place.

8. With matching thread a regular size stitches, sew the lower end of the over-sleeve to the jacket sleeve. This stitching is visible and permanent. Secure the rest of the edges to each other by stitching inside the seam allowance. This stitching will not be visible.
9. Remove all the gathering stitches. From this point on, treat these two pieces as one and continue constructing the sleeve and the jacket as usual. Do make sure to flatten the balloon when you are attaching the sleeve to the jacket to prevent it form catching on the seams. Voila, you have big puffy sleeves!
There are more photos of the finished jacket on this previous post.
4 Responses