I’m pretending it’s still summer because summertime went by completely unused this year!
And so I’m still making dresses!
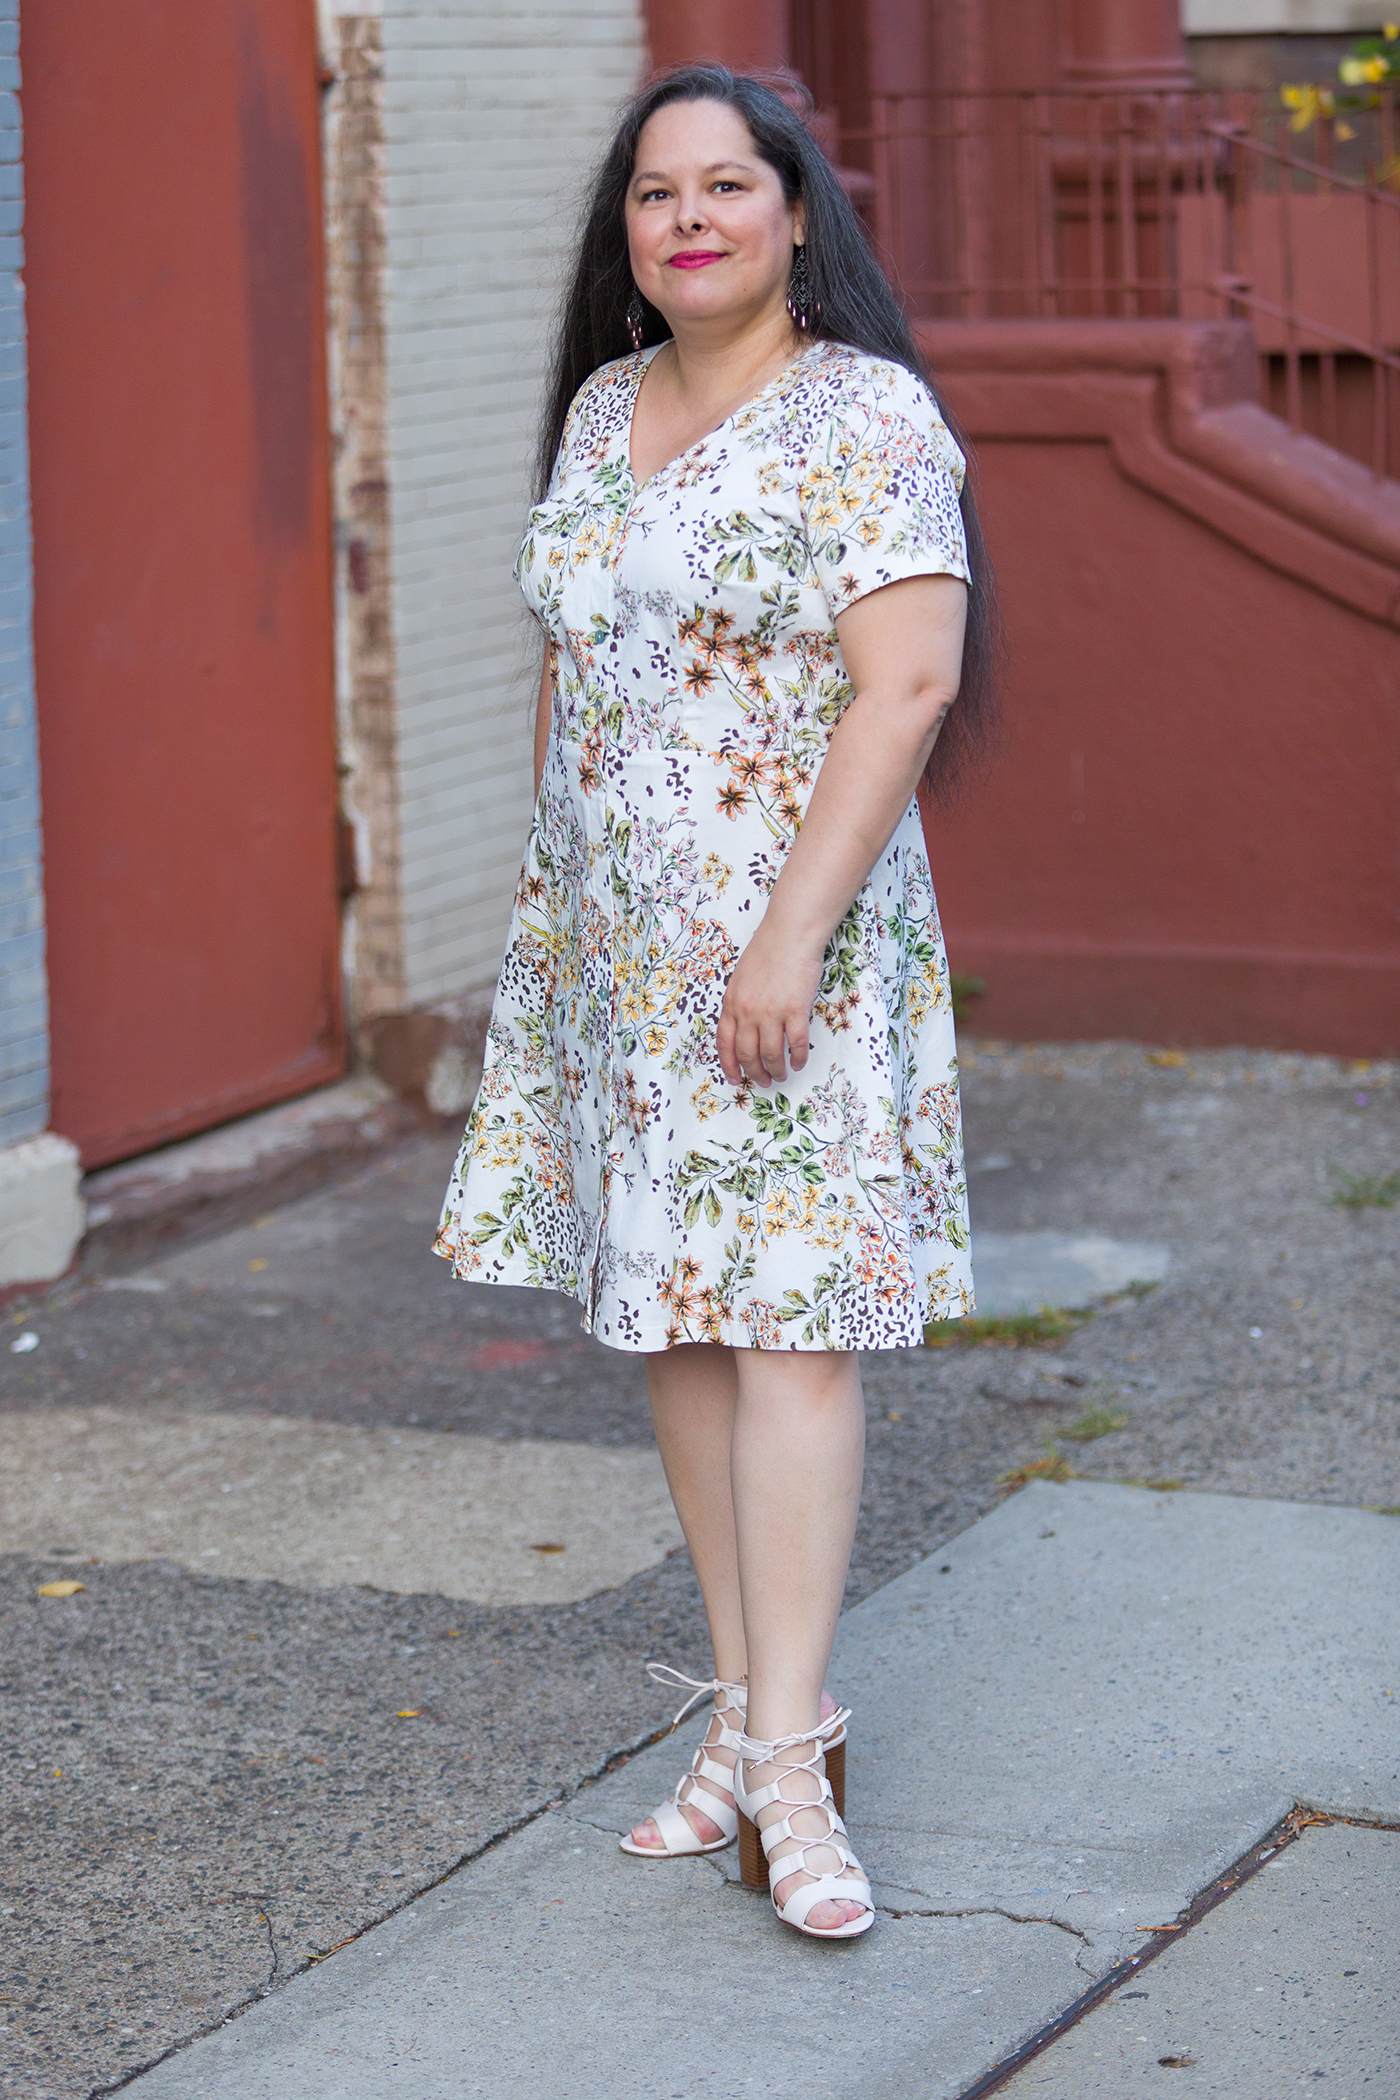
But I’m being slightly sensible and using fabric that can be transitioned into fall, as is the case with this stretch cotton sateen from Mood Fabrics.
I started with the fabric here because this dress also started with the fabric, and then I had to find a suitable pattern for it.
I first saw this print on the Mood website on a cotton voile and fell in love with it. But voile is a very light, summery fabric and, as I said, I wanted to make something that I could transition into fall.

So I ordered in this stretch cotton sateen at the beginning of the month, then it sat around until a few days ago. I always have plans to finish these Mood Sewing Network projects early in the month but I never really follow through.
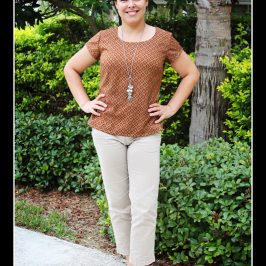
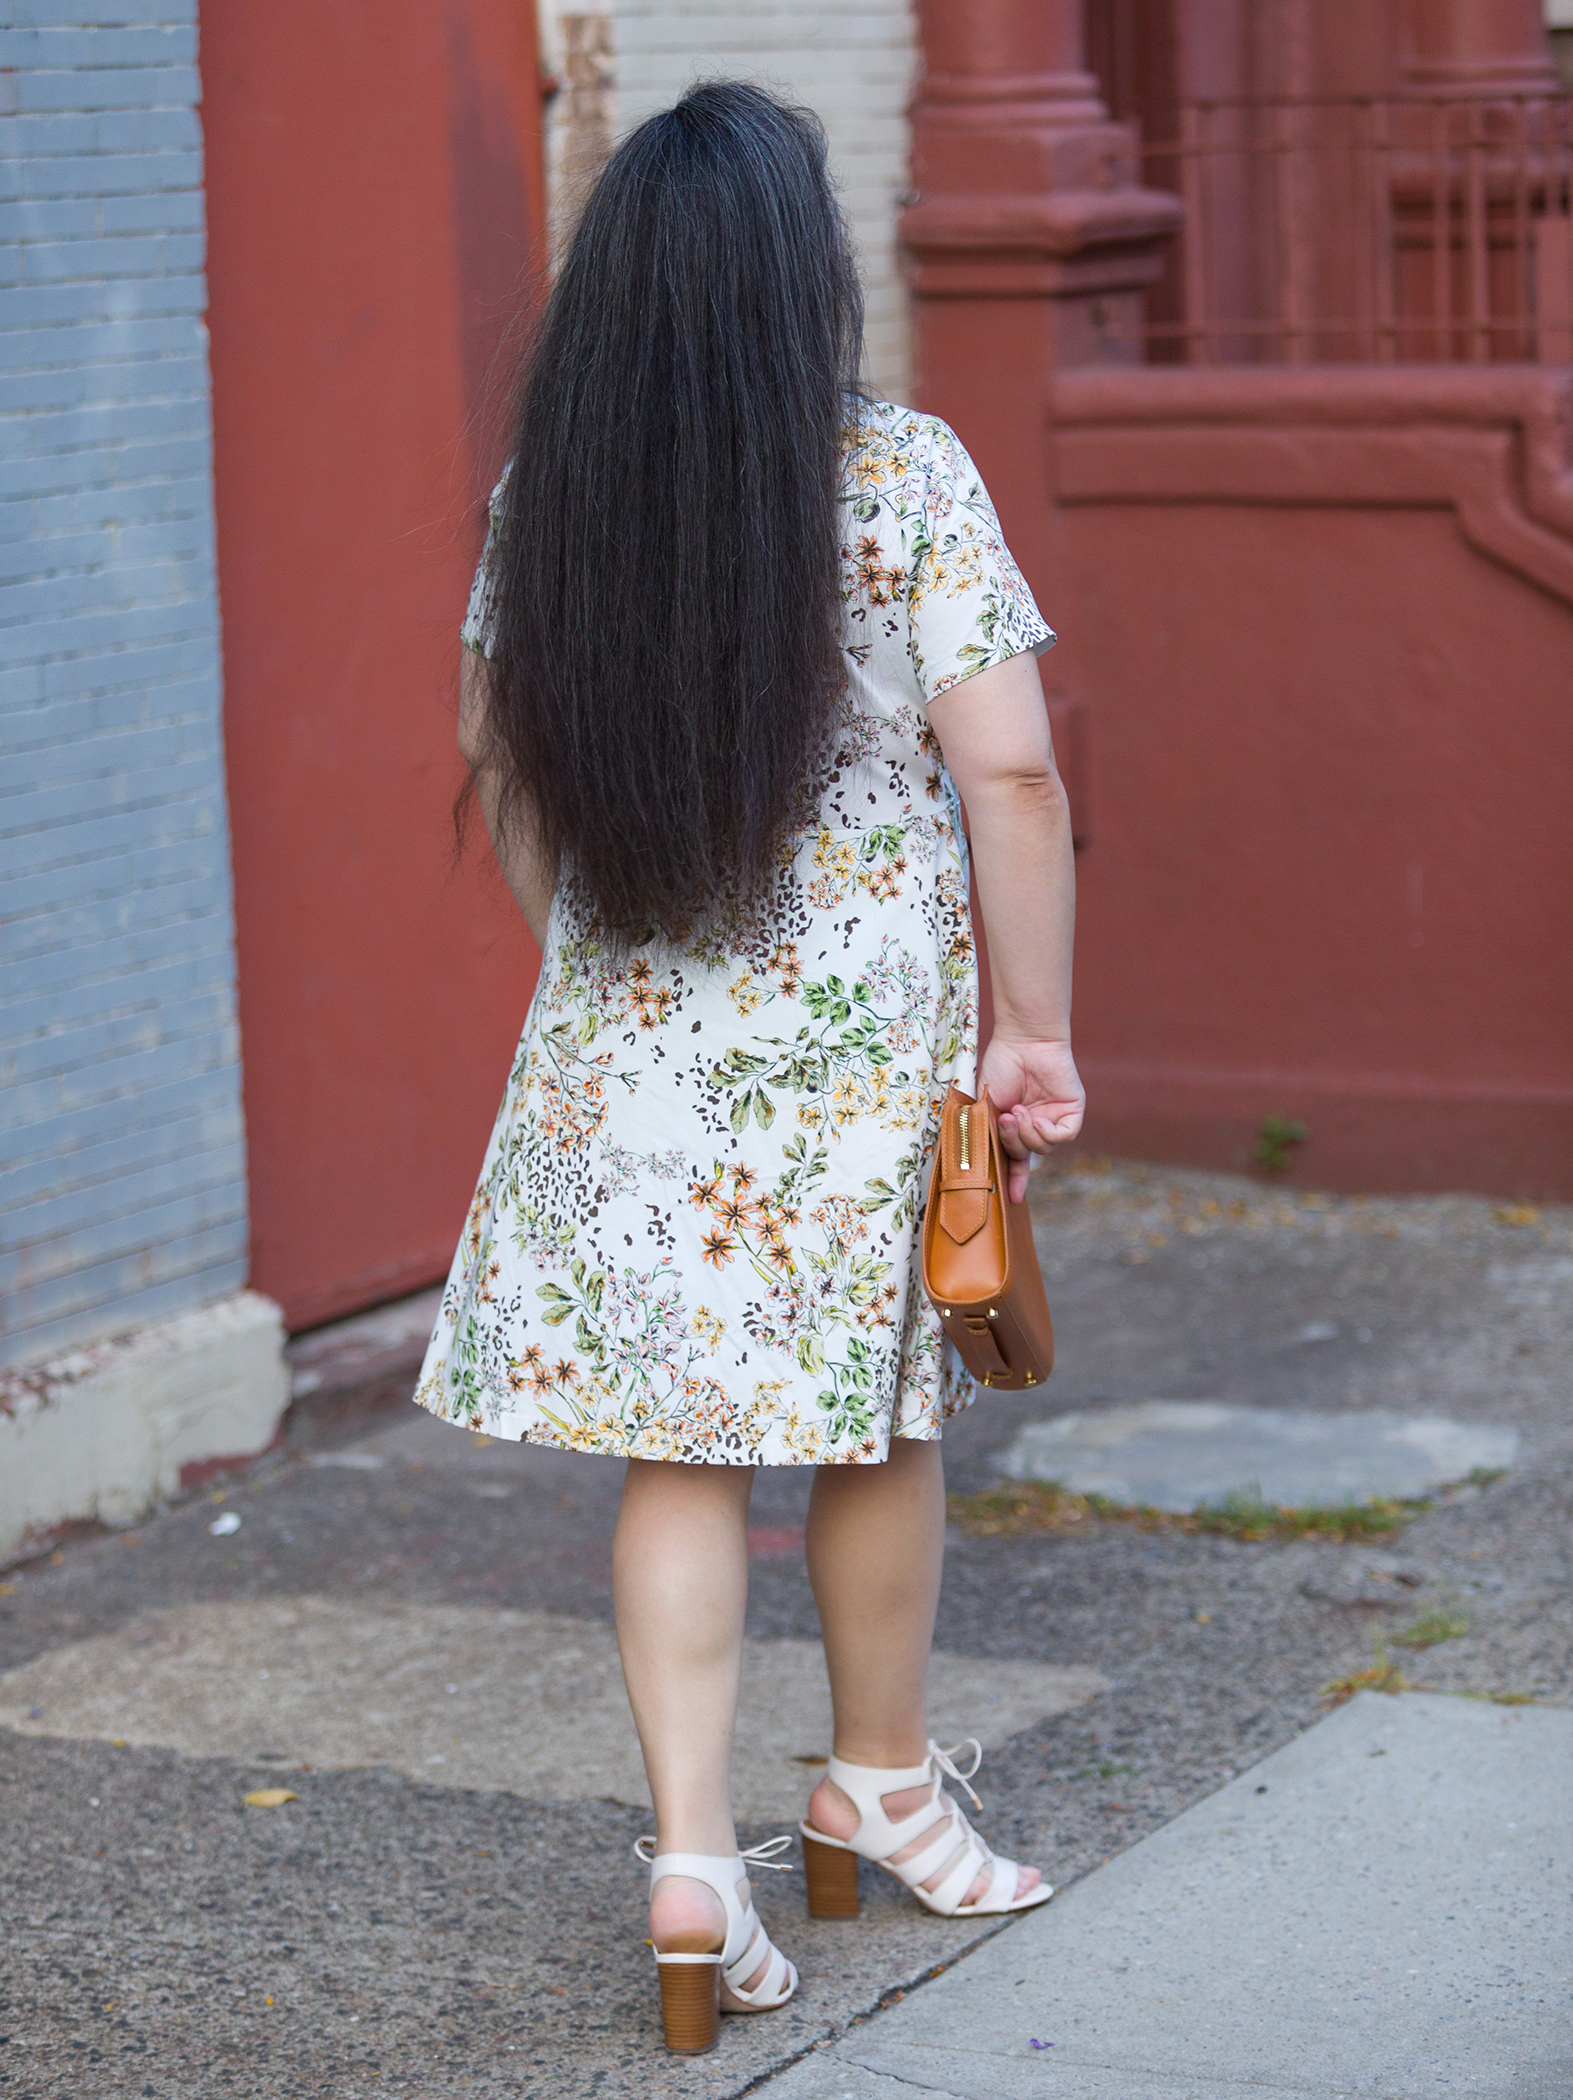
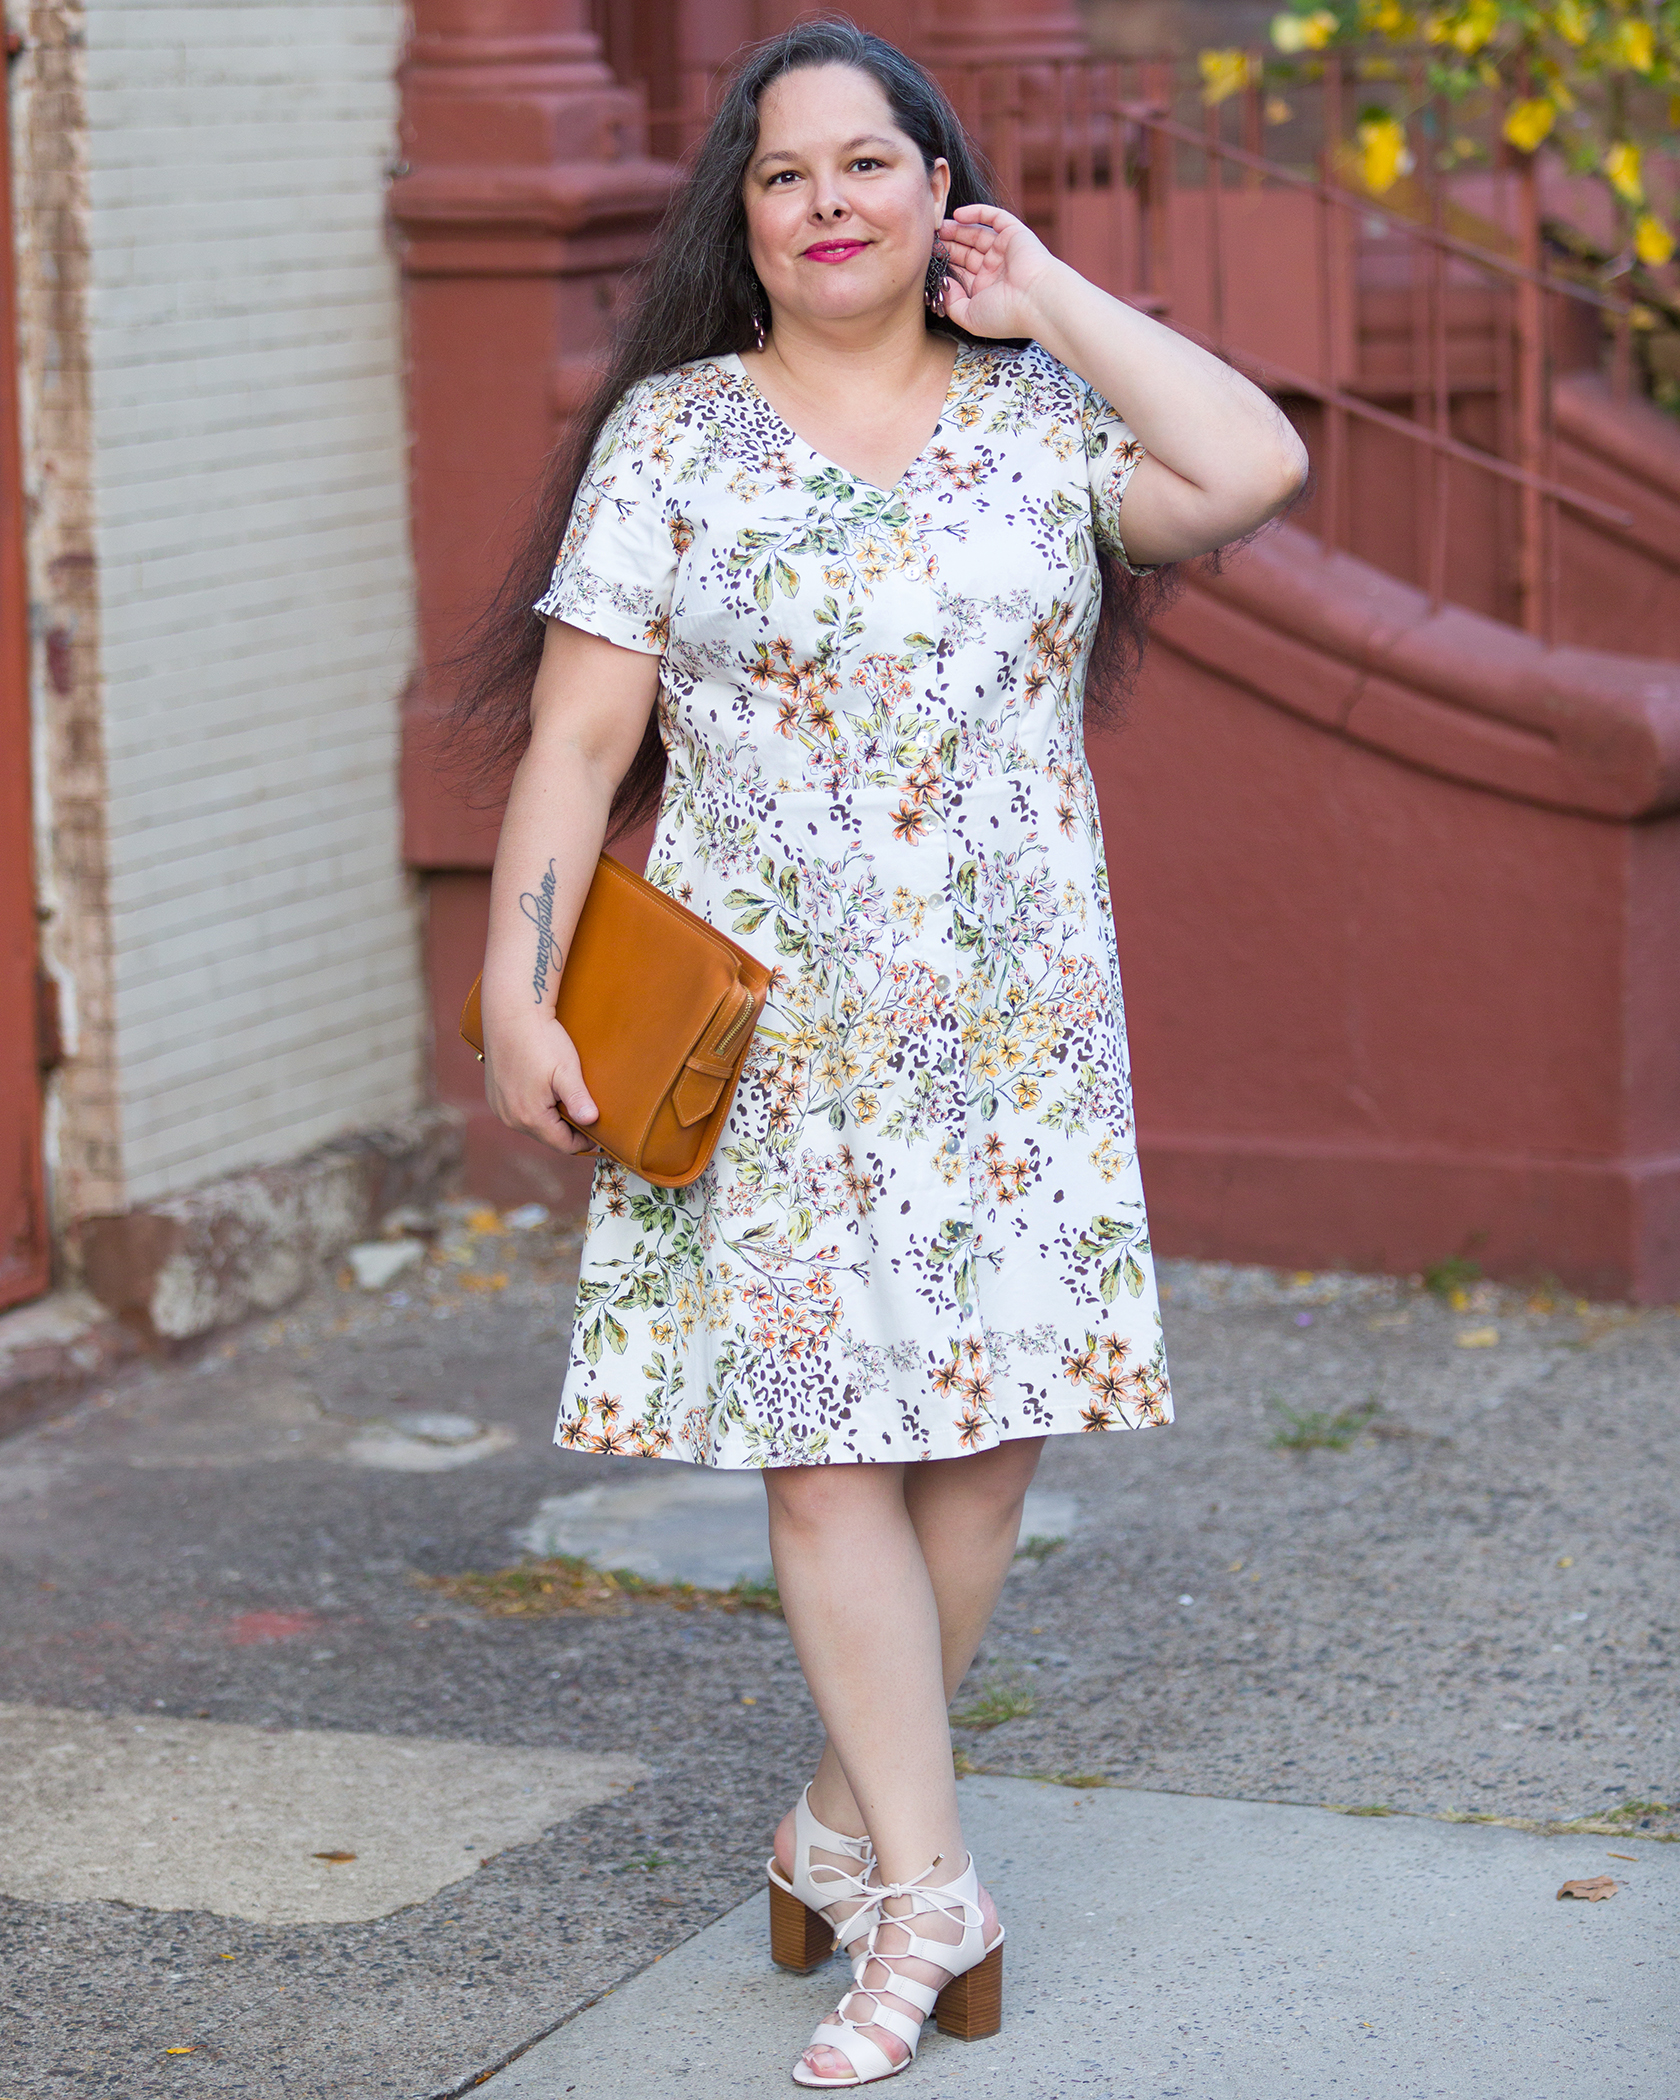
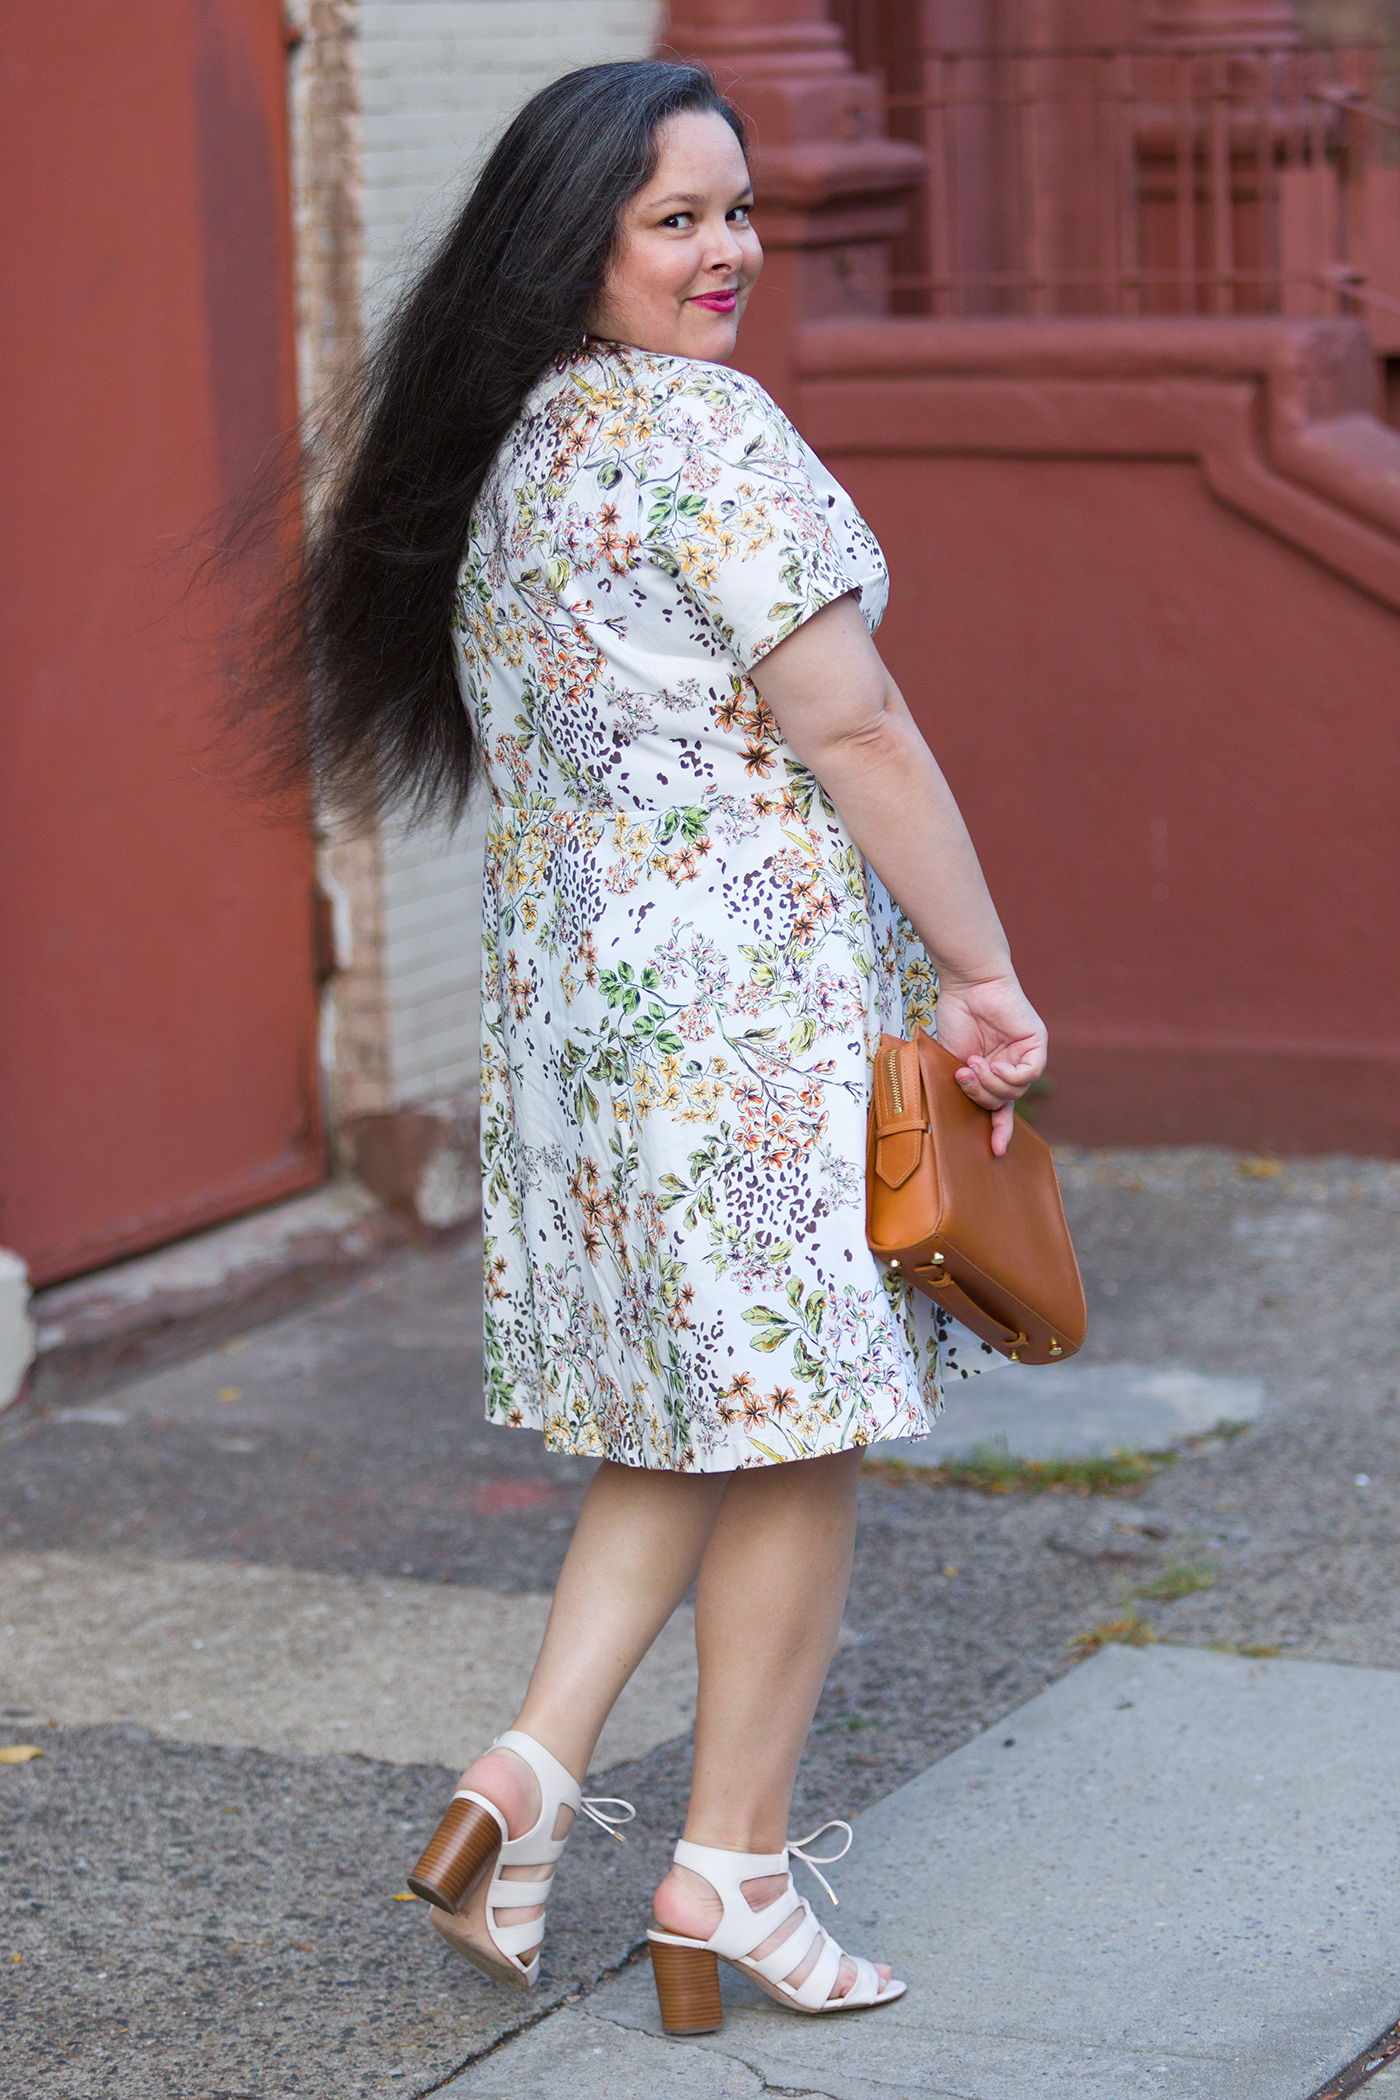
After much consideration, I settled on the Lyric Dress by Love Notions. I had made one version last month and it was a disaster, mostly because of the horrible fabric but it also needed fit adjustments. So, with new, nice fabric, I gave it another go.
Let’s get the most important thing about this pattern out of the way: IT HAS 4 DIFFERENT CUP SIZES! It comes with front pieces for cup sizes A-D.
That is great because it means I don’t have to make a full bust adjustment. I cut a size 16 with the C cup.
That said, I still had to make adjustments for fit. I shortened the bodice 1/2″ between the armhole and the bust dart, then moved the dart point up slightly and in towards the apex so that it was the right shape and length for my liking. The dart position at the side seams was fine so I used the same starting points for the dart legs.
The waist darts were too far out towards the side seams so I brought them in about 1/2″-3/4″ towards the center, then I raised the dart points 1/4″. I made these adjustments to the darts after I had shortened the bodice so they moved up quite a bit and produced better bust shaping on my body.
When looking at finished garment measurements I thought that the size 16 would be too snug at the waist but it turned out to be a bit loose. I couldn’t face rippping the waist and side seams to fix it. Instead, I placed the buttons half an inch further out from the center front towards the side seams; this made the entire bodice and skirt a bit more fitted. The buttonholes are still on the center front point of the right bodice piece.
As a side note, the pattern calls for 18 buttons for this dress. EIGHTEEN! I used 11 buttons and they are 2.5″ apart. I only shortened the whole dress 1/2″ so it’s not like that’s where the other buttons went. You absolutely do not need 18 buttons; it may be a design feature but you don’t need them to keep the dress closed.
If I was to make it again I would shorten the bodice another 1/2″ between the shoulders and the bust. I would also take a larger seam allowance on the side because I don’t think that the size 14 would fit.
The dress is fine and I am happy with it, but I do have some issues with the pattern, mostly the directions.
I said this before in my video review of the Forte Top and it holds true for the Lyric Dress: the instructions are not very organized and you have to jump around quite a bit.
Organization aside, the instructions call for some questionable sewing techniques. Rather than have you set the sleeves in, the instructions tell you to sew them in flat. Later, the instructions have you sew them as one seam with the bodice and skirt side seam.
Why, I have no idea. This is OK for knits but not for wovens. Sleeves in garments made from woven fabrics should really have set-in sleeves. I set in mine and there isn’t much sleeve cap ease so it’s not difficult to do. (Whether or not you think that sleeve cap ease is bogus is another matter).
For the skirt and bodice, the pattern instructions have you sew the skirt fronts to bodice fronts and skirt back to bodice back at the waist seam and then sew the side seams of both – and the sleeves – in one go. Usually, you sew the bodice together, sew the skirt together, and then sew skirt to bodice,
Their method is not wrong, at least for the skirt and bodice side seams, but it is unusual. Sewing it that way does make it easy to make adjustments to the side seams though. That is assuming you want to take the side seams in and not let them out. You can’t let them out, the seam allowance is only 3/8″. Again, this is fine for knits but not enough for woven, in my opinion. The ready-to-wear industry often uses tiny seam allowances to save fabric but that’s unnecessary in home sewing. I prefer at least 1/2″ for wovens; that’s how much I add for most seams when I make patterns without seam allowances.
These construction idiosyncrasies, I think, are part of the reason why the instructions jump around so much and are confusing.
I did not follow these instructions though, and constructed the dress differently. I prefer to complete as much of a single unit as possible before sewing it to the the next unit. For instance, sew all the bodice seams, sew the sleeve seams and attach to the bodice; sew all the skirt seams, then attach to bodice, and so on. It makes more sense to me and there is less jumping around.
But while the instructions, construction methods, and seam allowances leave a lot to be desired, the drafting is fine. And let’s not forget those four cup sizes!
I want to go back to the fabric for a moment because I want to be transparent with you.
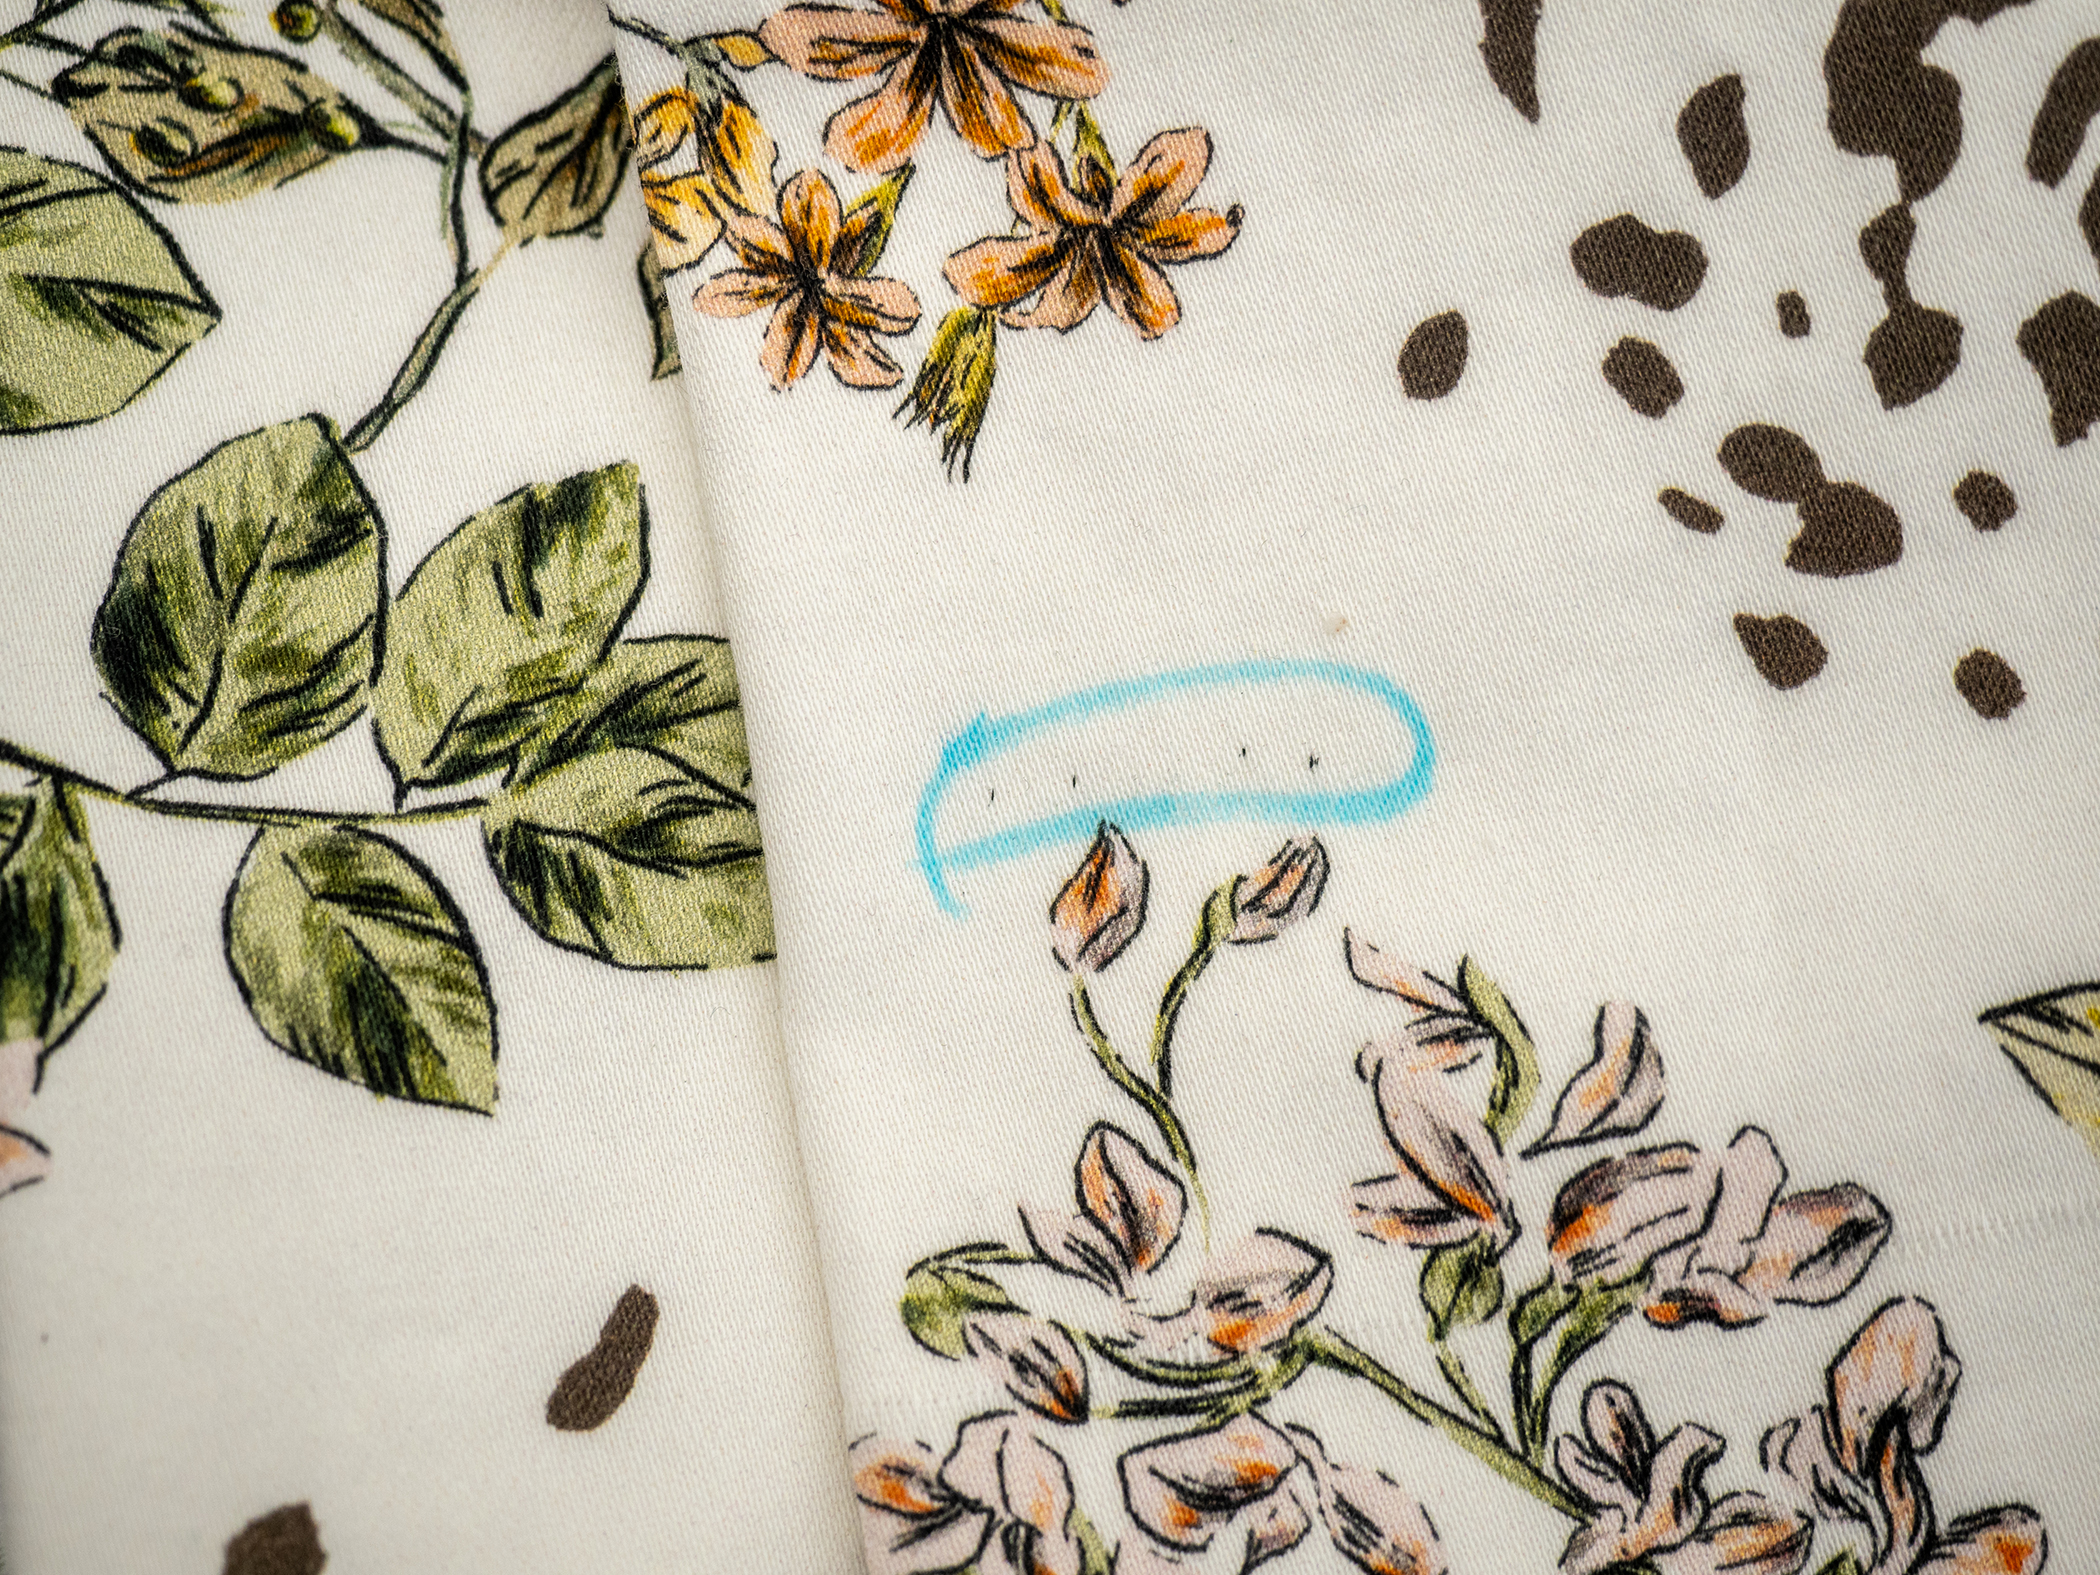
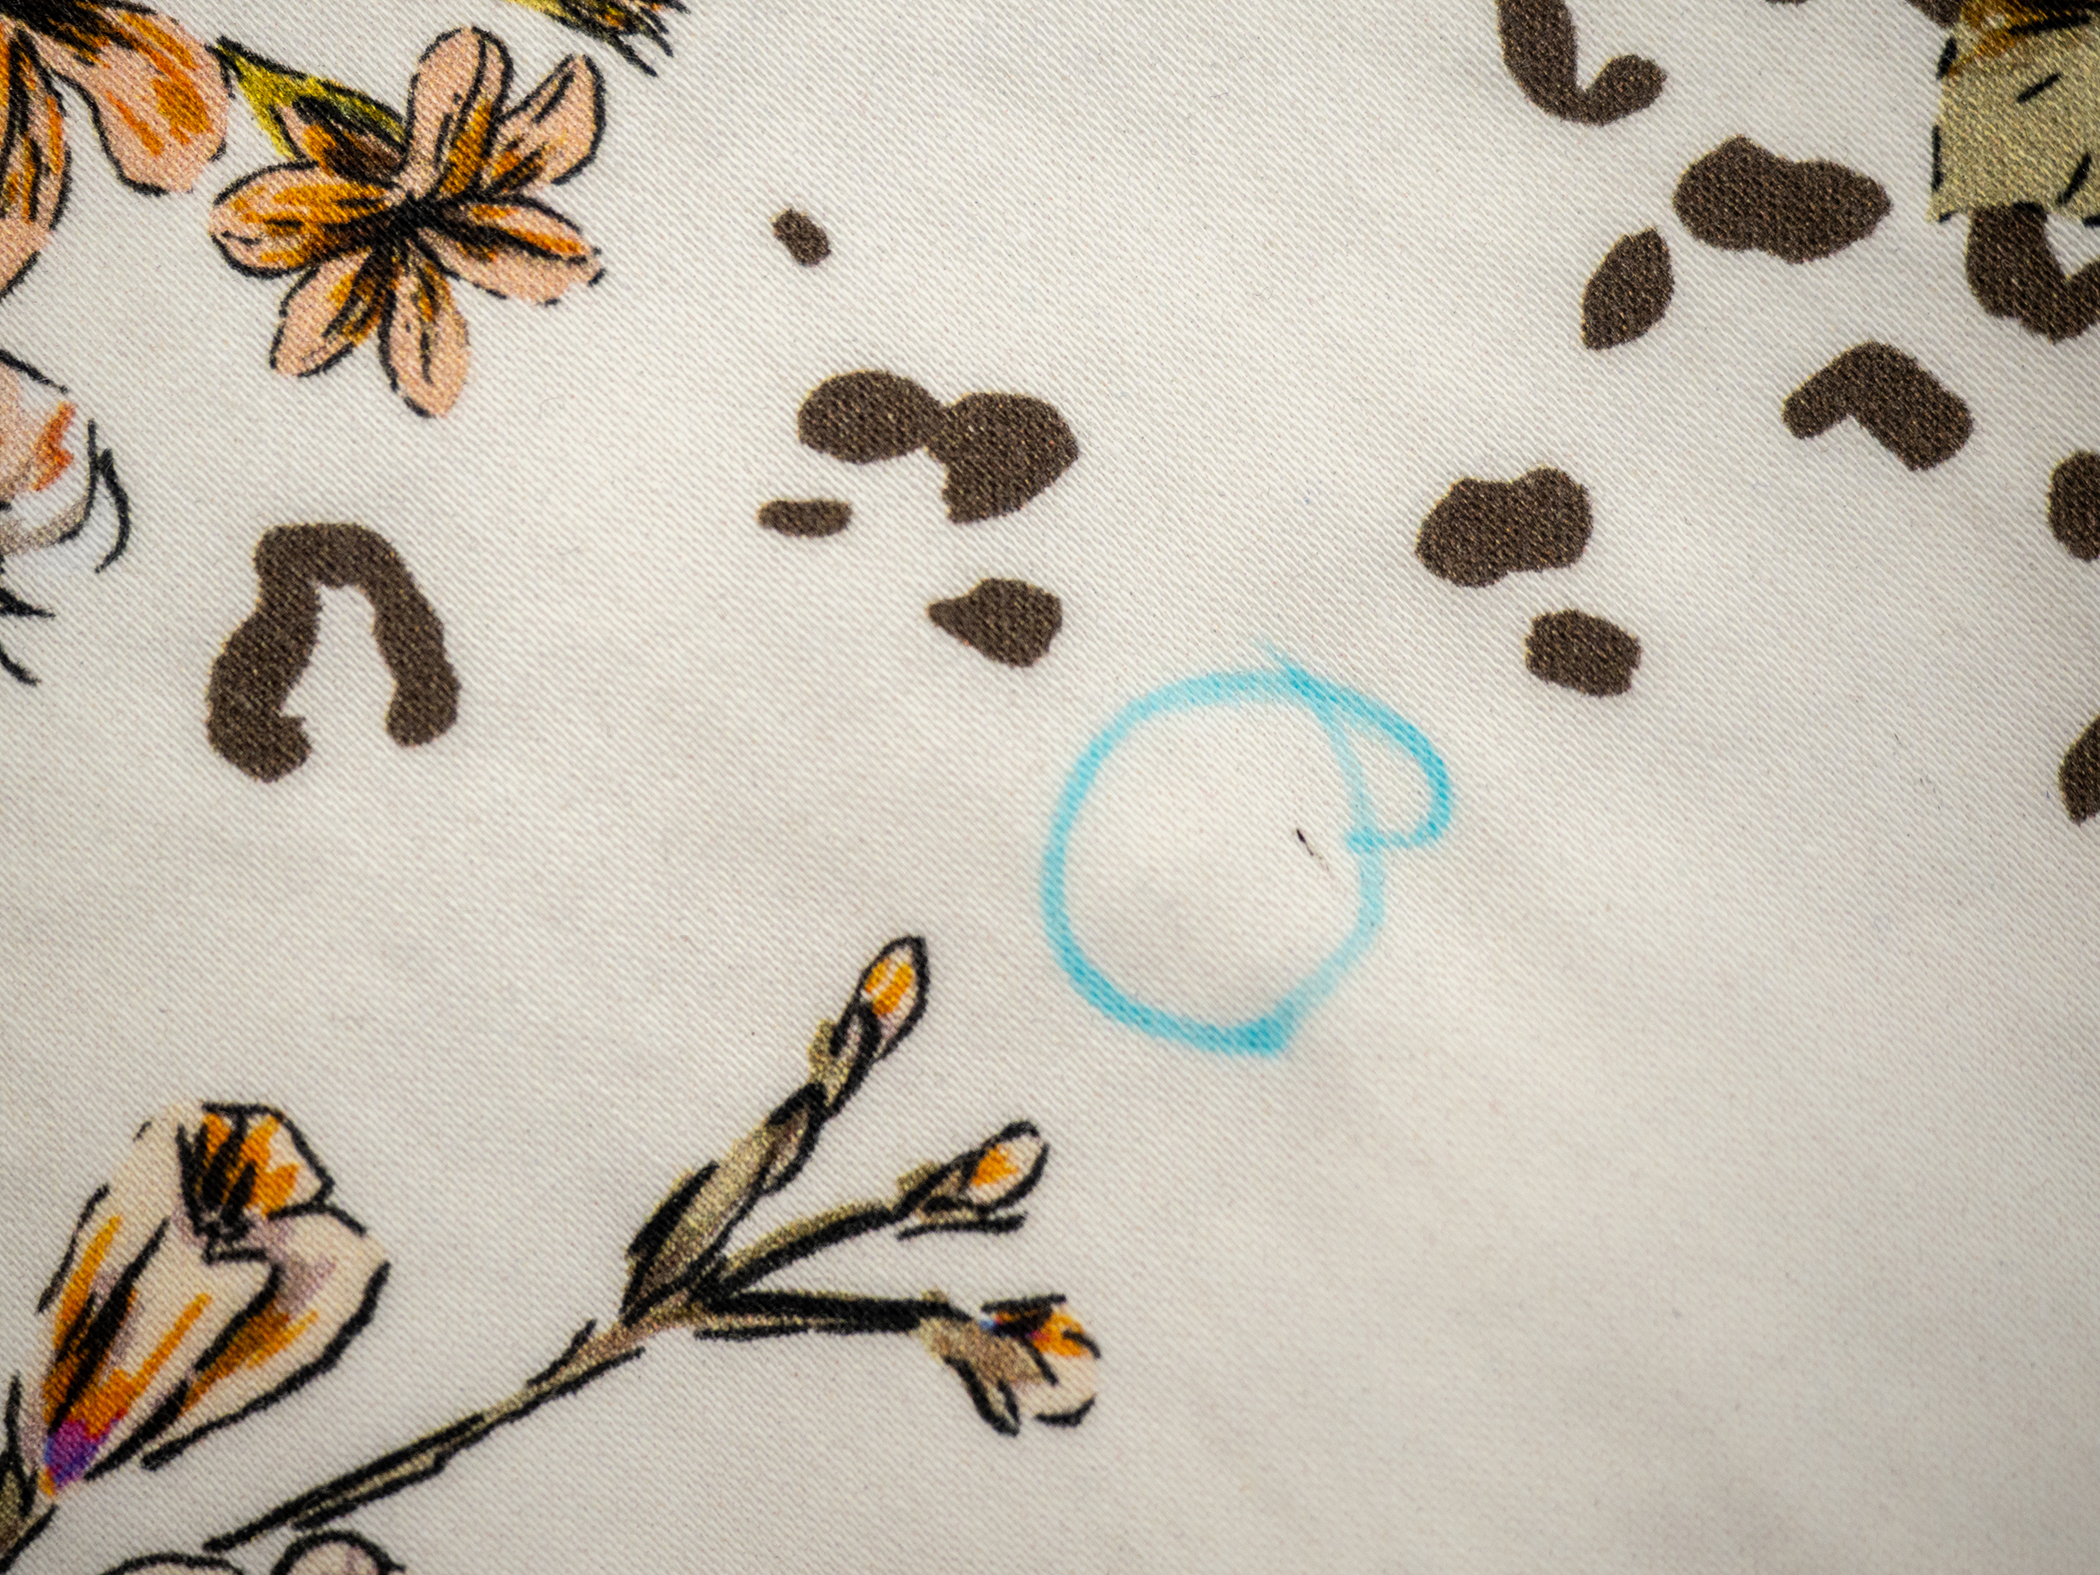
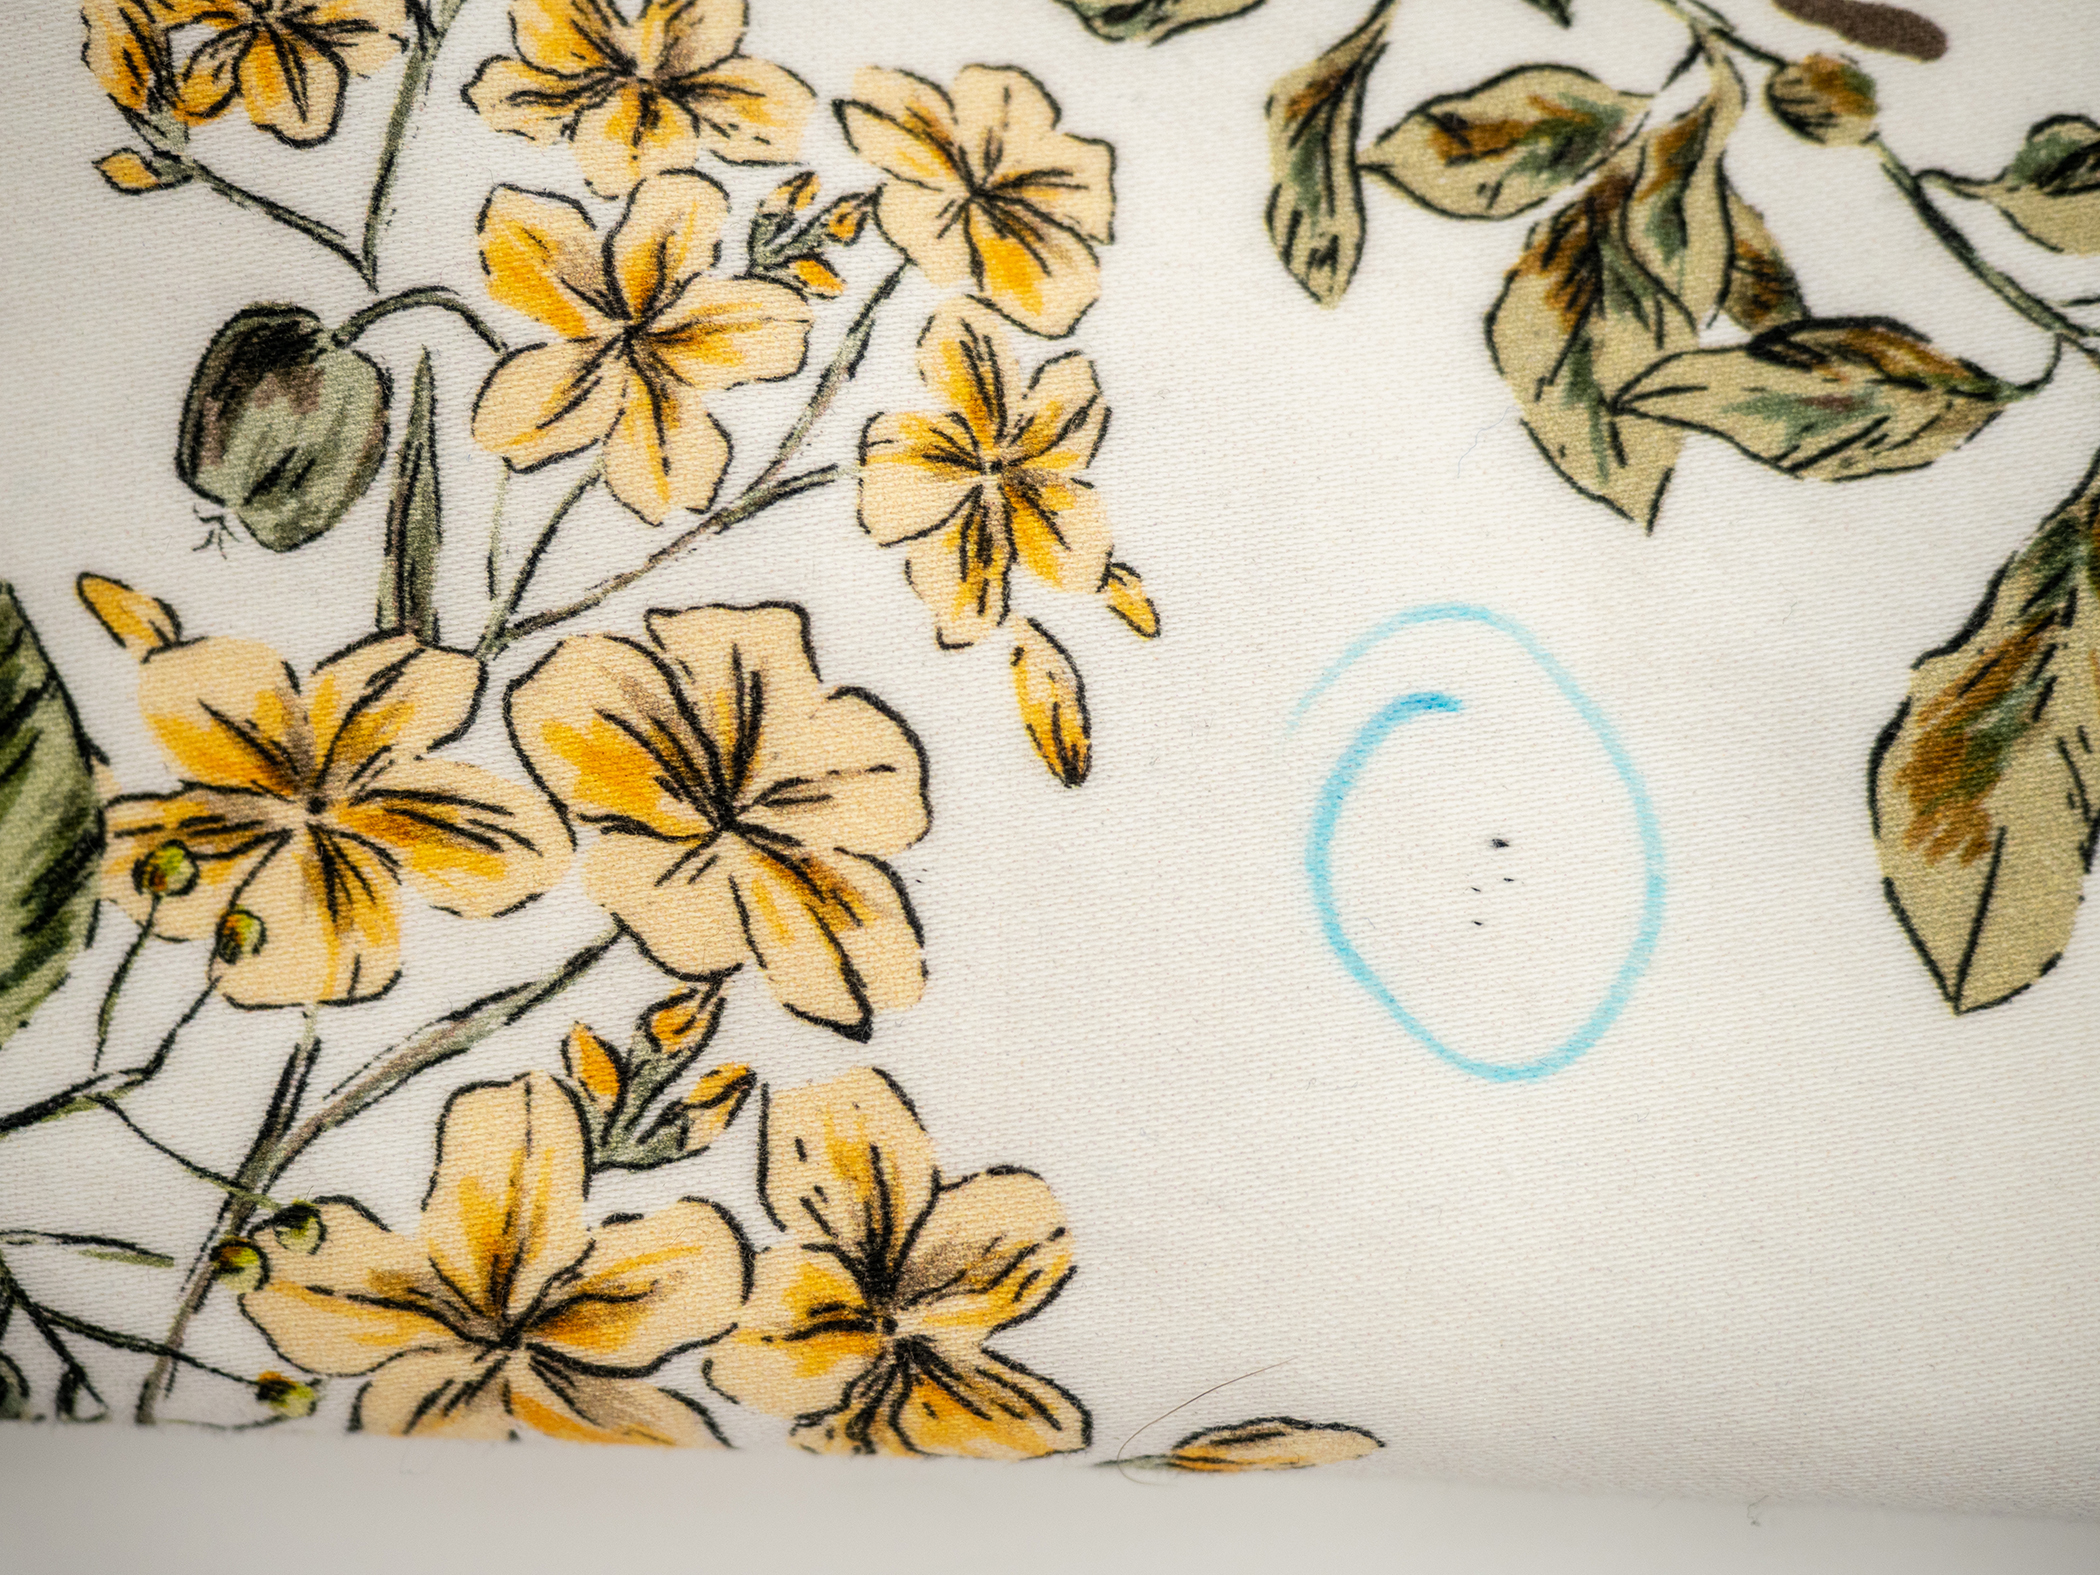
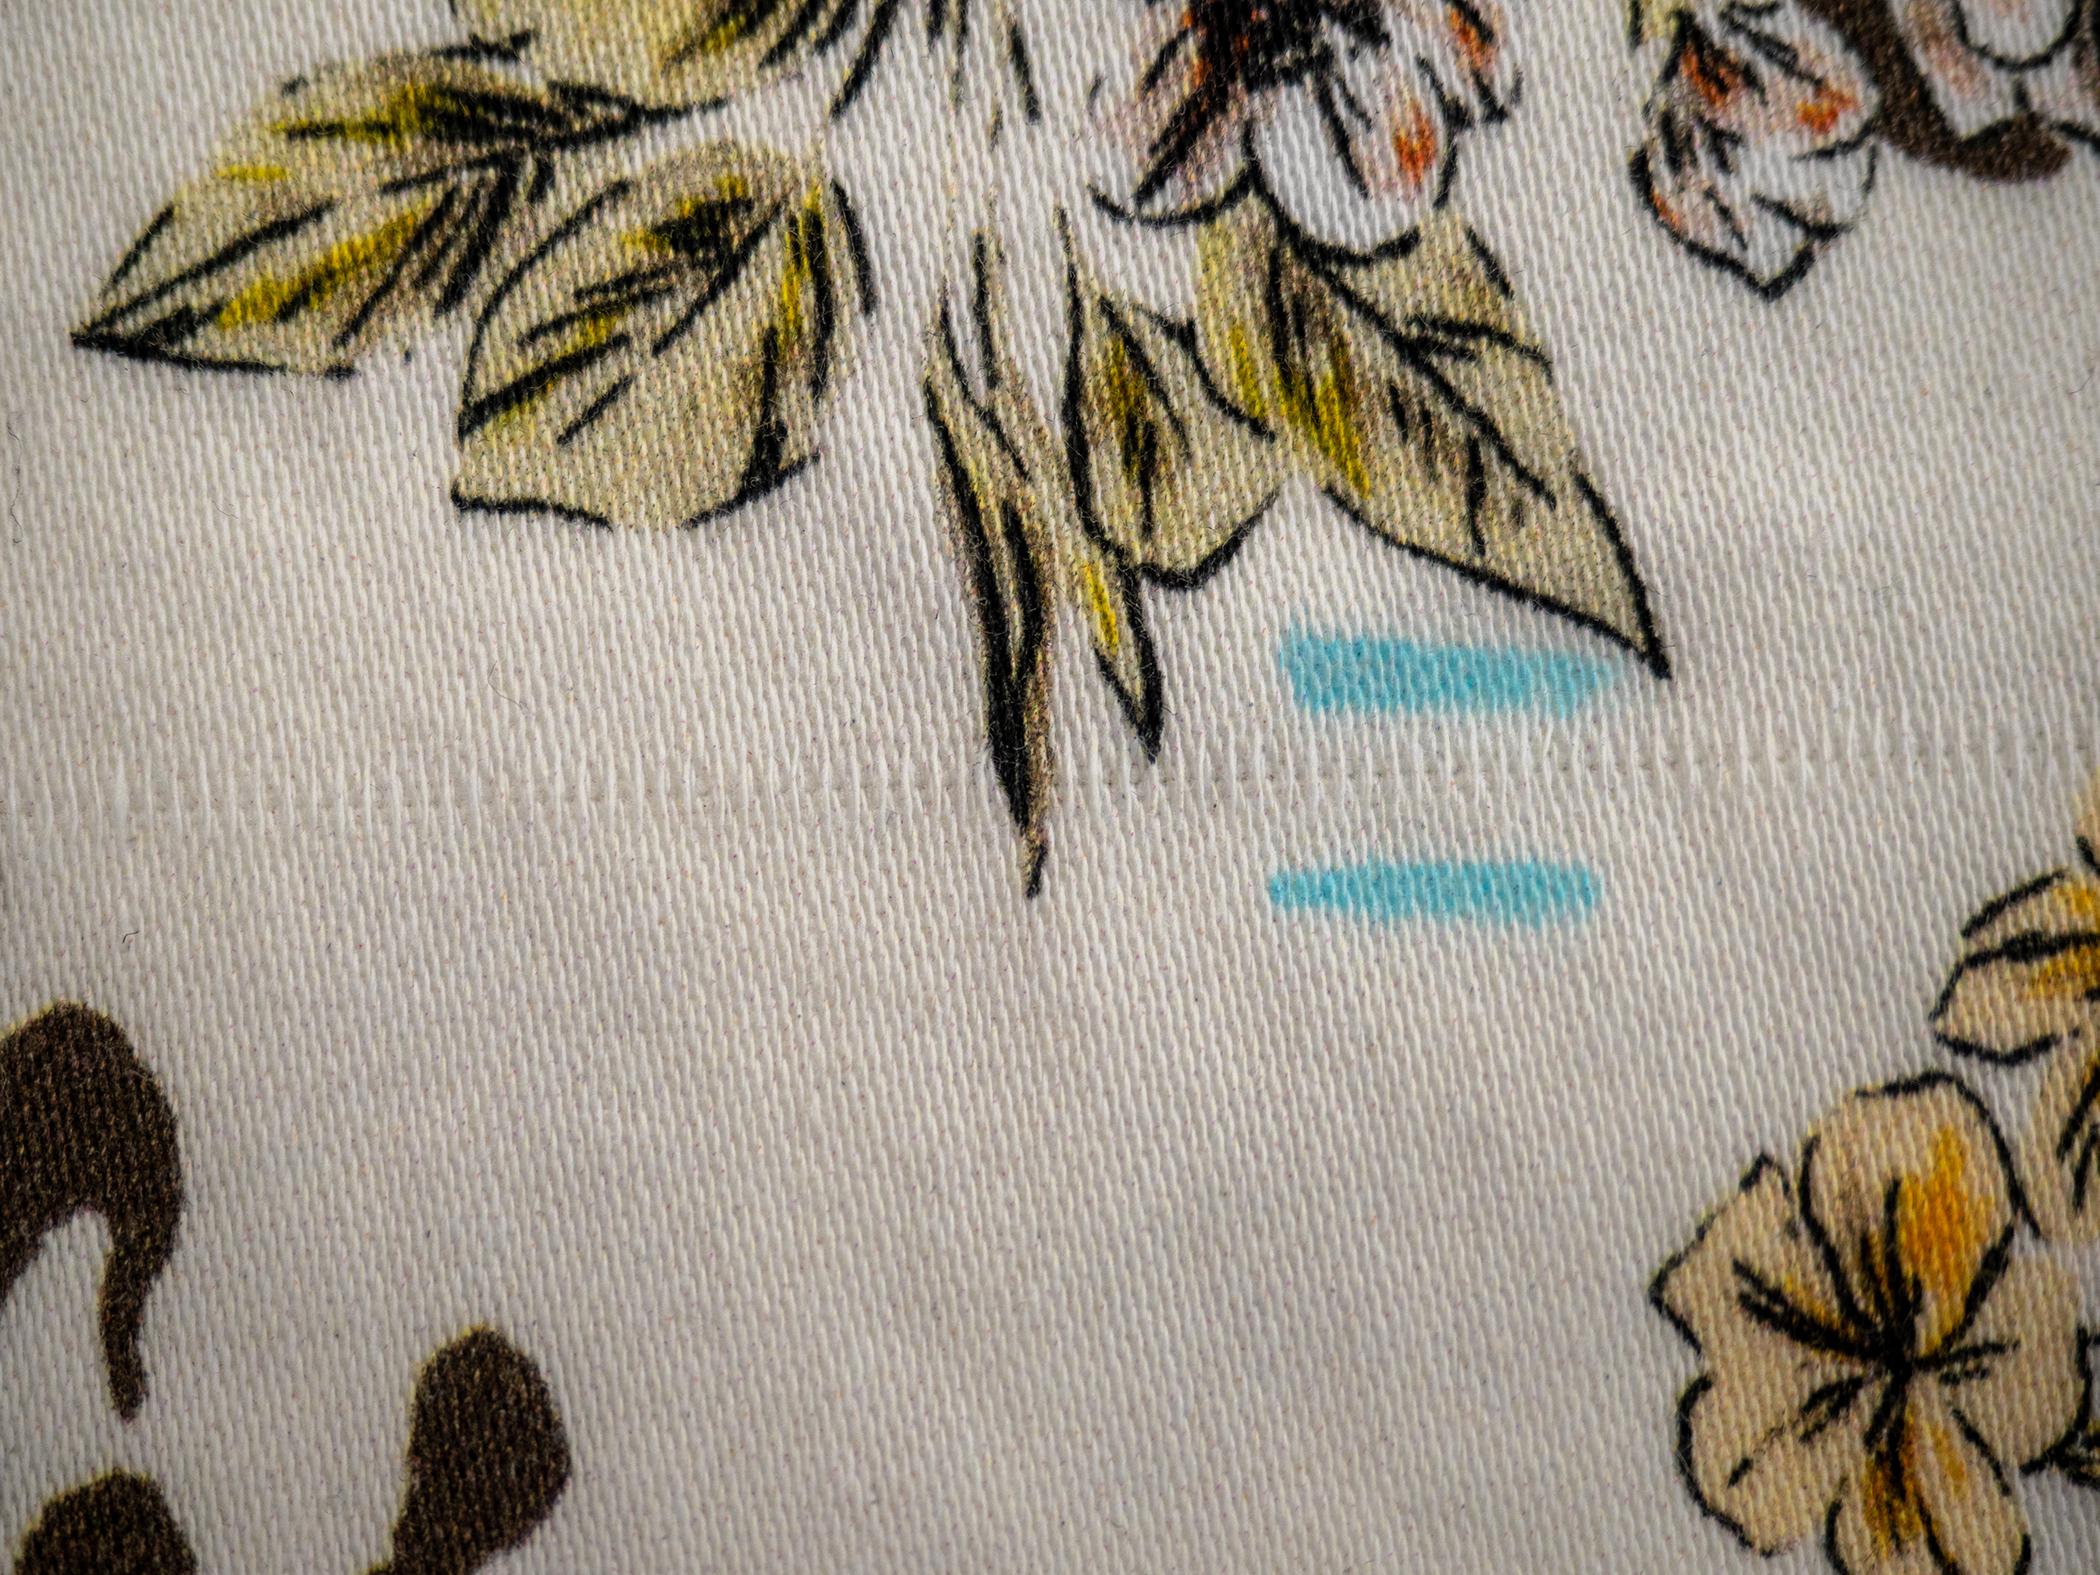
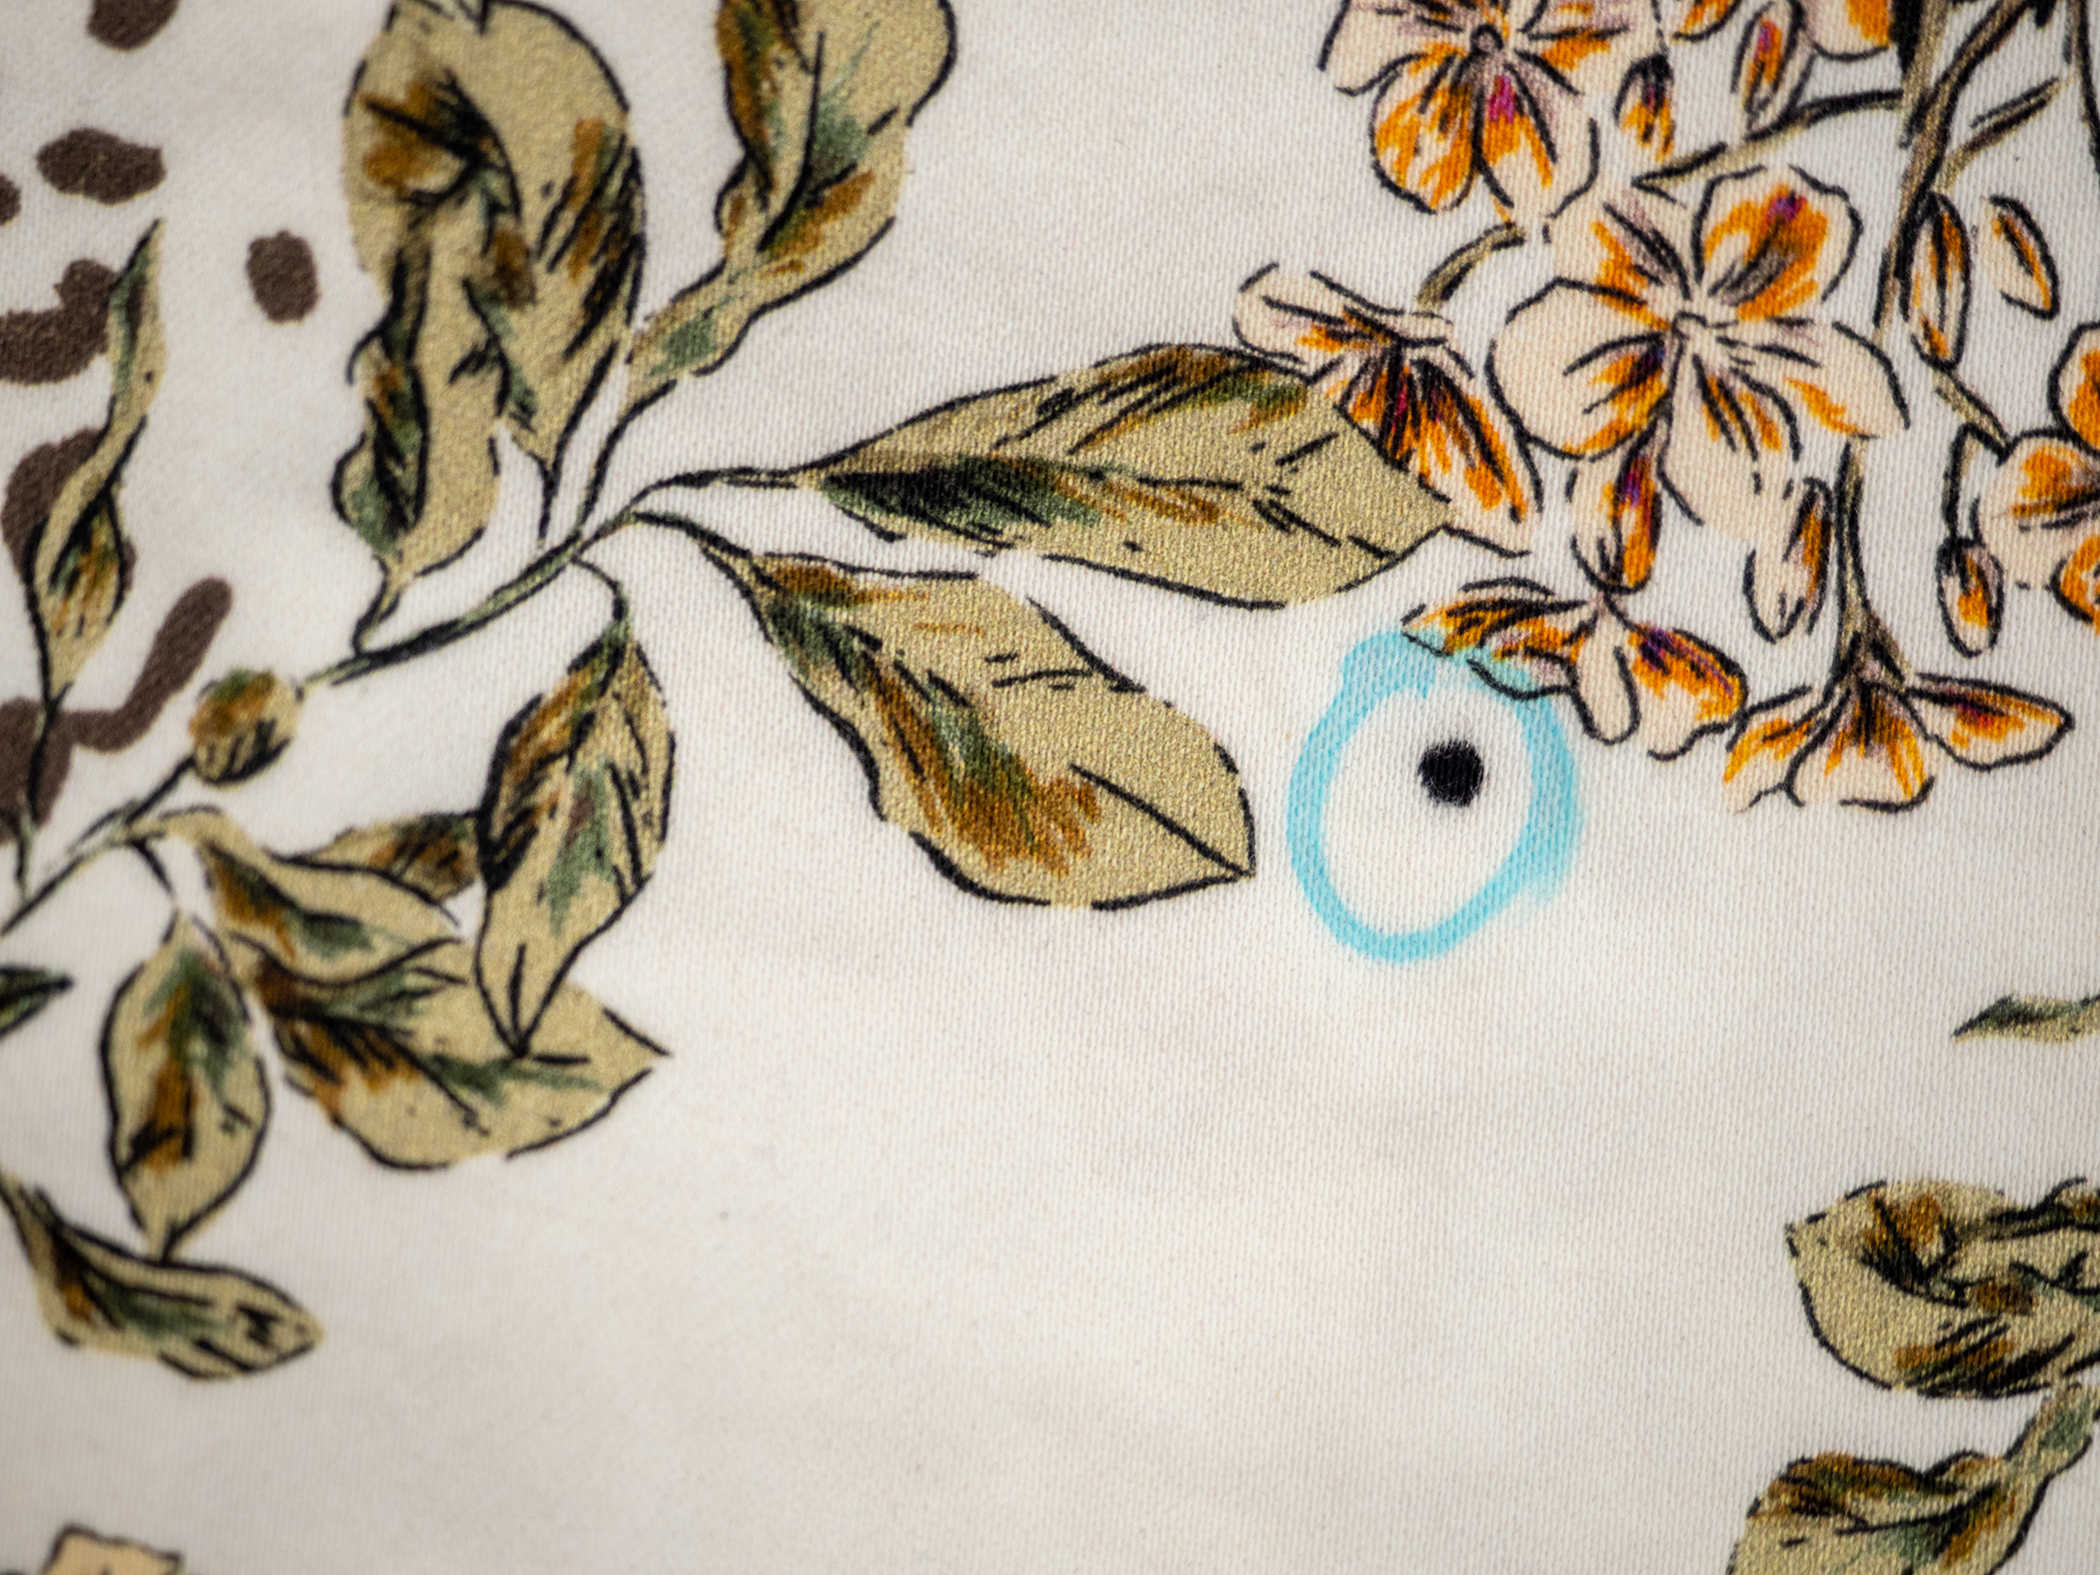
As nice as the fabric is, it did have some flaws, which I didn’t see until I was about to start cutting.
Most of the flaws are ink spots; some are light and barely visible and others quite obvious. There was also a strange ridge running across the width of the fabric towards the end of my yardage. it looks like the yarns got twisted there or something like that.
I was able to work around these flaws because I had gotten more fabric than I needed. It would have been another matter entirely if I had bought just what the pattern called for.
I’m putting some photos here so you can see for yourself and decide whether it’s something you can live with if you want to buy the fabric.

That’s for it this month’s Mood Sewing Network project, just in the nick of time because I’m a master procrastinator!